Create AWS RHEL 8 EC2 Instance
Cloud Tutorials
Download Create AWS RHEL 8 EC2 Instance tutorial.
In this tutorial, we will be creating an AWS Elastic Compute (EC2) instance with RHEL 8 as the operating system.
Prerequisites
- an AWS Free Tier account
- internet access
If you do not have an AWS account, you can access my
AWS Create Free Tier Account tutorial here

Steps to complete tutorial:
AWS Login
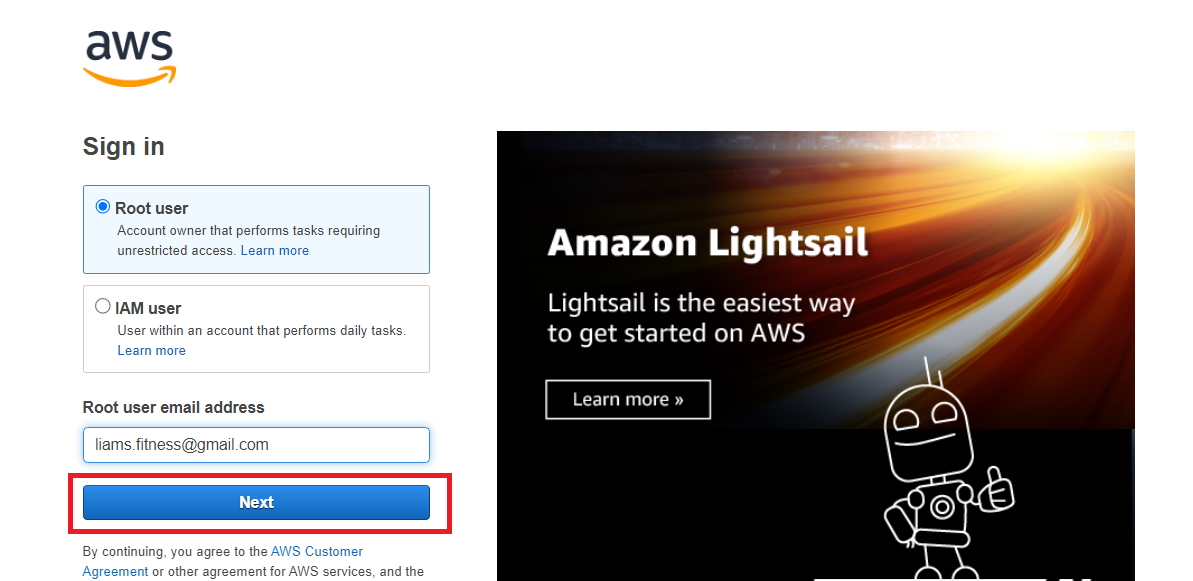
To begin, go to the following website,https://aws.amazon.com/console/ and log in to the console.

Enter the Root user's email address that you specified during registration. Click Next.
Next is the security check. Enter the characters and click Submit

Finally, enter the Root user's password and click Sign in.

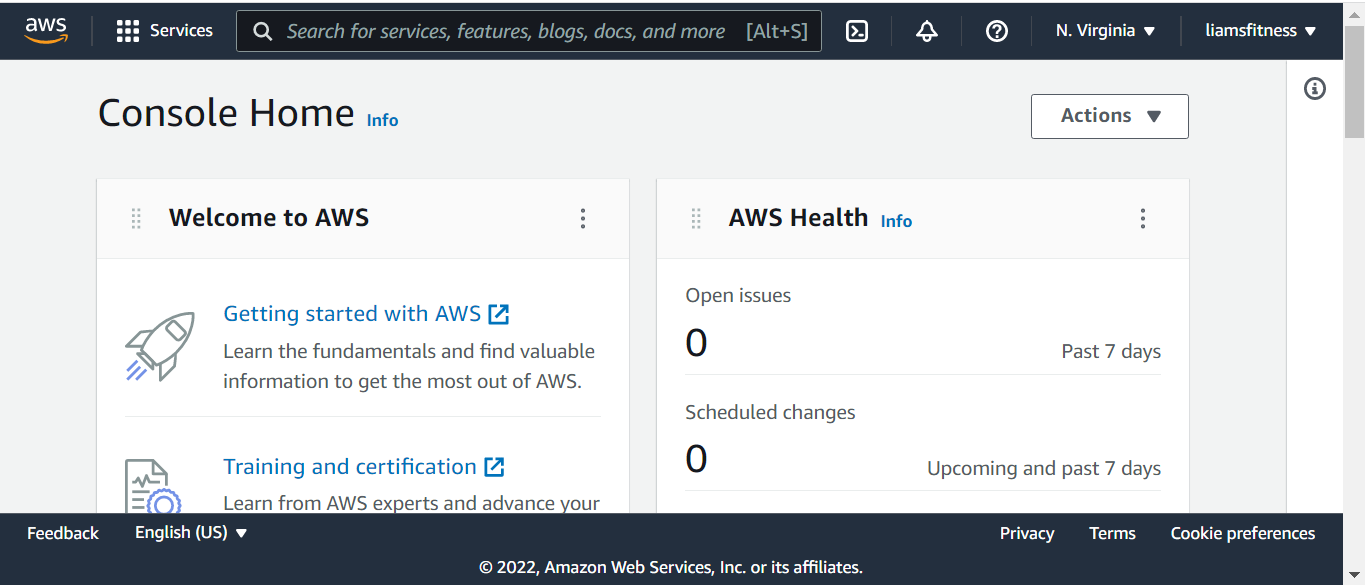
You will now be brought to AWS Console Home.
If you've already completed my AWS Create Ubuntu 20 Elastic Compute Instance tutorial, you can skip this step and go directly to Create RHEL 8 EC2 Instance
Before we create the EC2 instance, we will configure our default VPC (Virtual Private Cloud) so that it will be easier to work with moving forward. The VPC will allow us to launch resources in an isolated virtual network.
Update Virtual Private Cloud (VPC)
Once logged in, enter VPC in the search bar and select VPC Isolated Cloud Resources.

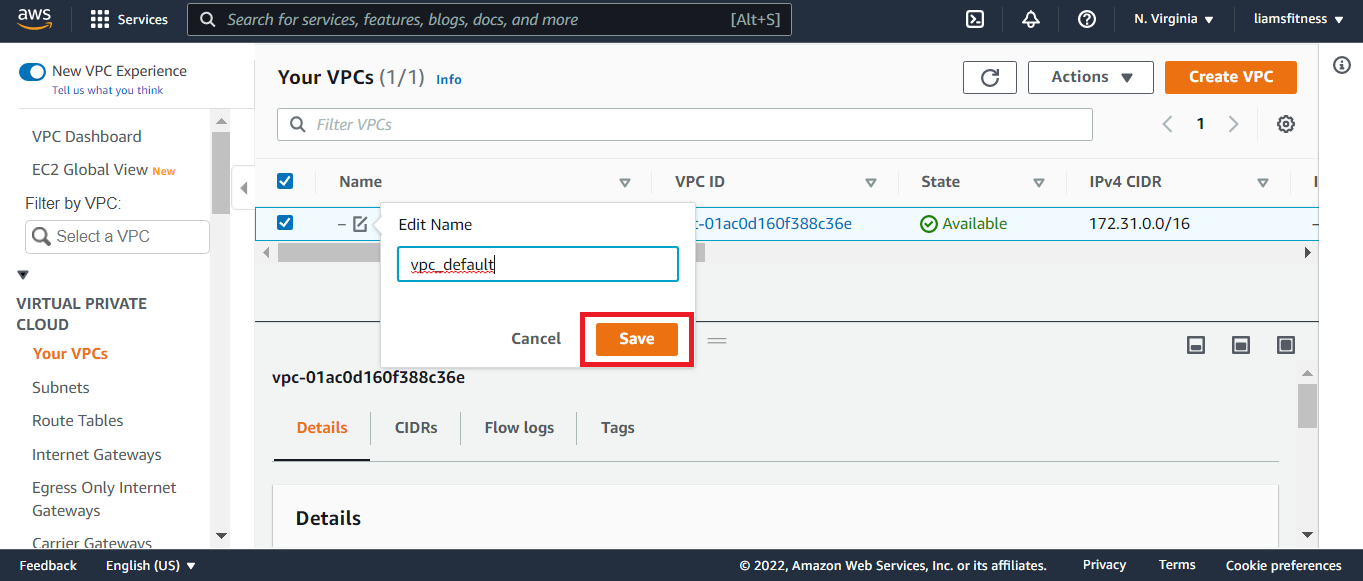
On the VPC Dashboard, select VPCs


Let's set the name to vpc_default and click save
Now, on the left hand side of the screen click Subnets

Once the subnet list page appears, notice that 6 subnets have already been created for us.
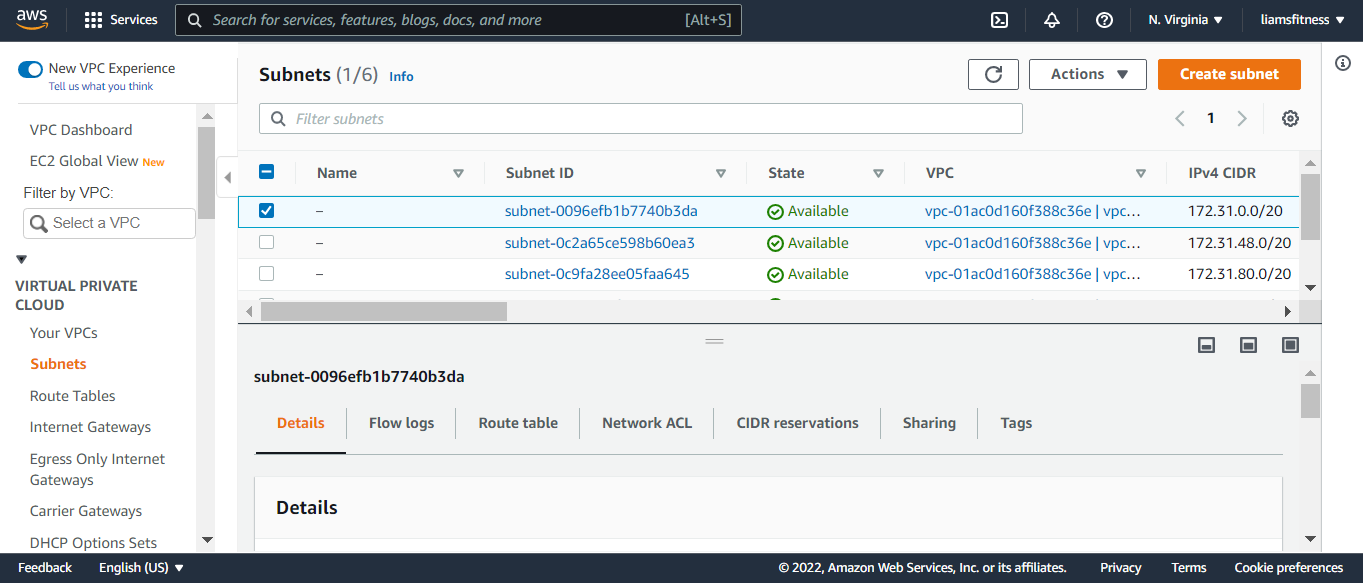
Set the name of the first subnet to subnet_default and click save Also note that the CIDR IPv4 subnet is 172.31.0.0/20.


Create RHEL 8 EC2 Instance
Now we can proceed to create our instance, enter EC2 in the search bar and select the 1st EC2 listing.

You will be brought to the EC2 Dashboard. It contains links to the resources being used in the selected AWS region. In my case it's US East (N. Virginia).
From the EC2 dashboard, click Instances (all links will work, your choice).

Next, click Launch Instances (either link will work, your choice).

The first step will be to select the image we want to use.

Scroll down the page until you locate Red Hat Enterprise Linux 8 and click the Select button next to the listing.

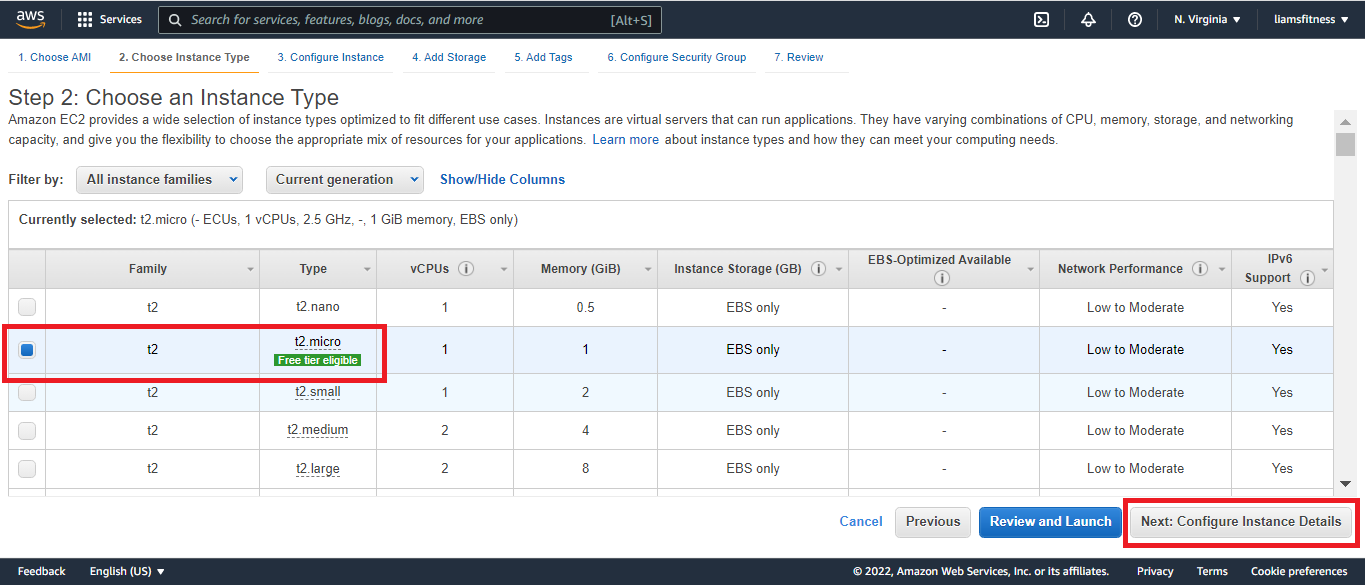
In the second step, we choose the instance type. Since we want a free instance, select t2.micro and
click Next: Configure Instance Details.
The third step allows us to select the VPC (vpc_default) and subnet (subnet_default) that we named earlier. After making those changes, click Next: Add Storage.

The fourth step allows us to set the storage size and add volumes if we wish. The root volume of 10GB is enough for RHEL 8. In a future tutorial, I will be demonstrating disk partitioning, as well as, LVM management, so I will also add 3 additional volumes. Click Add New Volume.
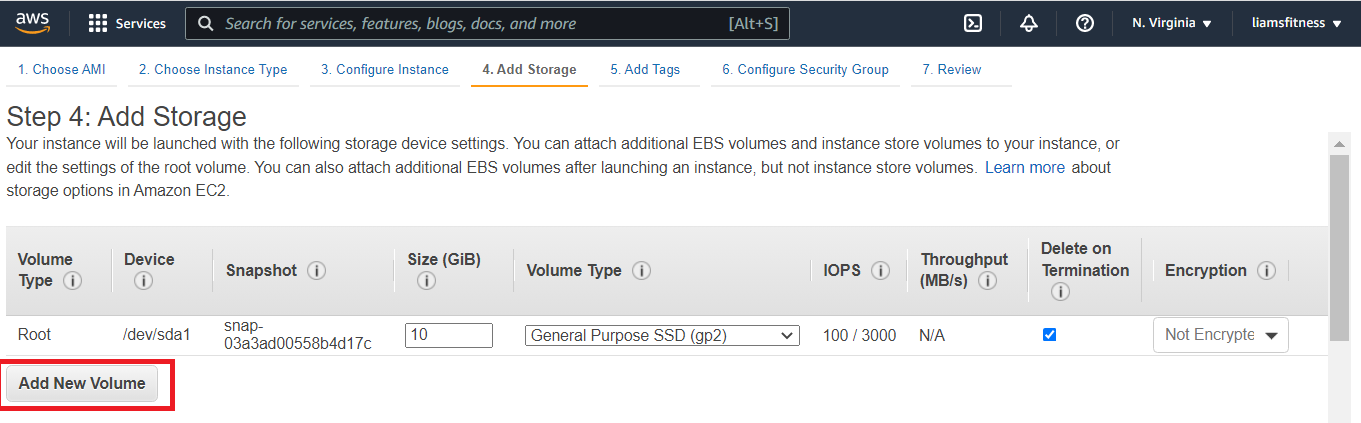
After clicking the Add New Volume button, I set the size to 1GB and checked Delete on Termination.

I repeated these steps 3 times total. After setting the storage, click Next: Add Tags.

***Note: There is a 30GB max volume size for all your instances combined throughout the month. If you go over it, you will pay the cost.
The fifth step allows us to tag our instance. Tagging helps categorize our resources. We will keep it simple by adding a name tag. To do this click the click to add a Name tag link and set the name to whatever you desire.
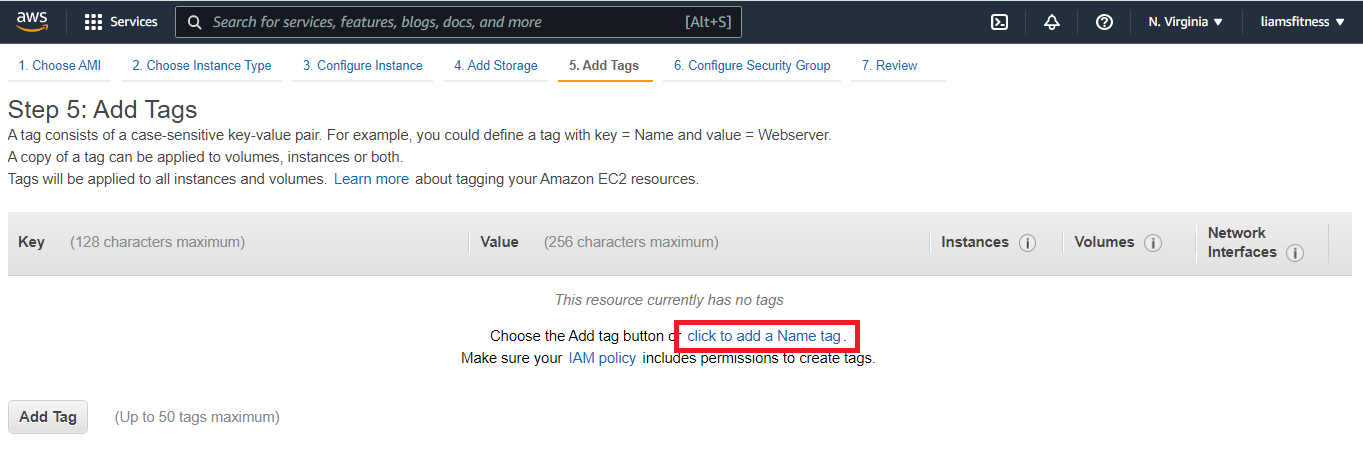
Once finished, click Next: Configure Security Group.

In the sixth step, before launching, we will create a security group named security-group2.
Note that only port 22 is open and that we are only allowing SSH connections to our instance. I also provided a
small description, Limit access to instance.
After you've set the security group details, click Review and Launch.

This final step allows you to review your selections. After you've finished reviewing, click Launch.
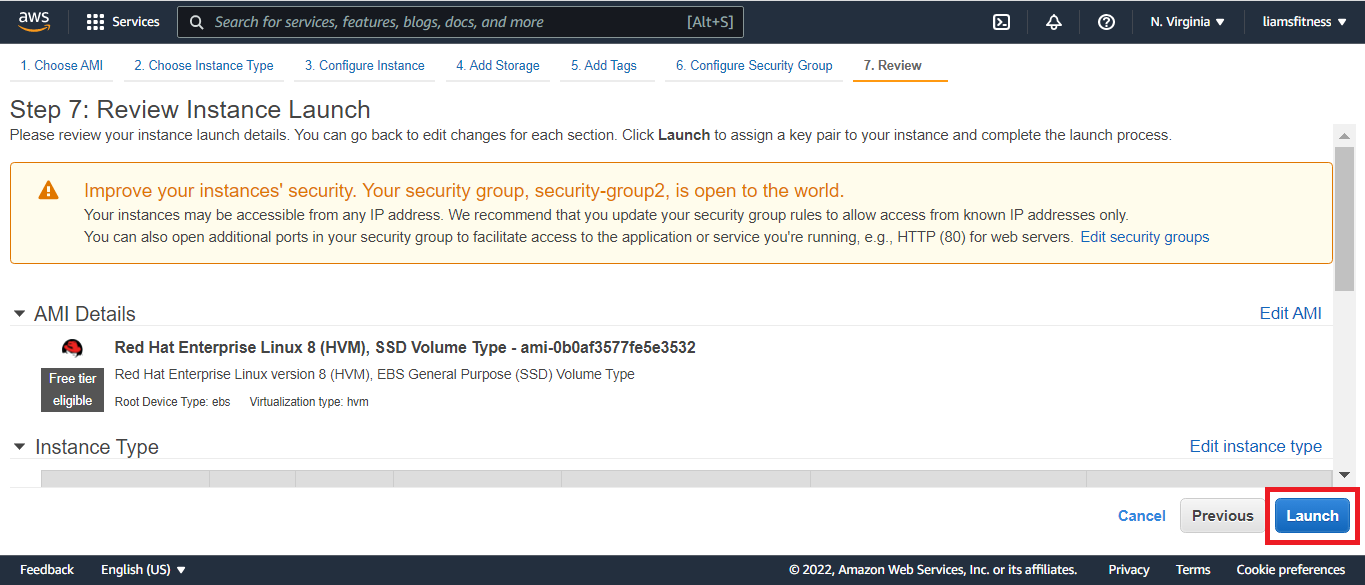
Prior to launch, we must create a key pair that can be used with an SSH connection to access our newly created instance.
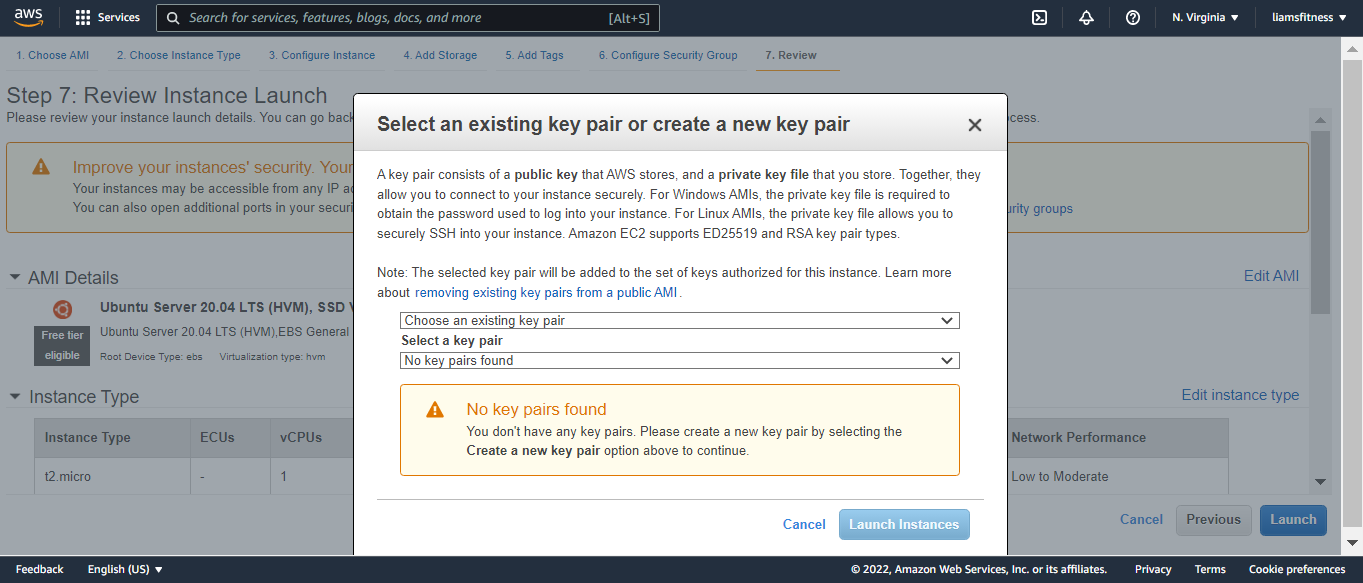
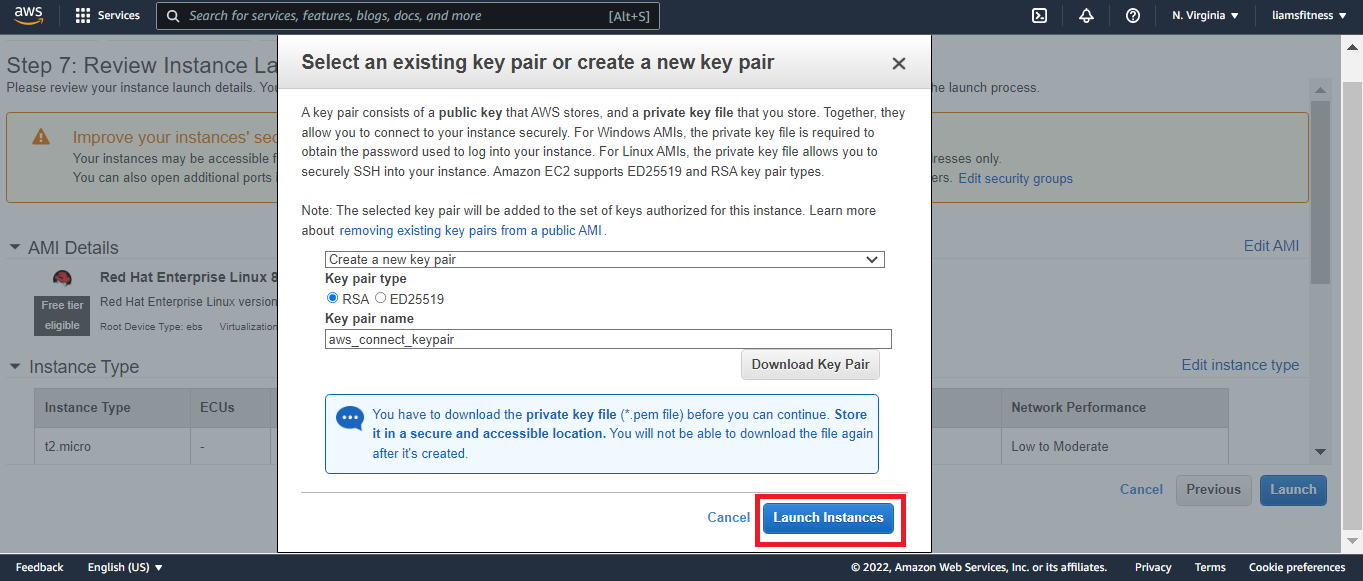
Ensure Create a new key pair is selected. Also, ensure that Key pair type is set to RSA. Then, give it a name (aws_connect_keypair). Finally, click Download Key Pair and save it somewhere on your PC.

After you download the key pair (aws_connect_keypair.pem), you will be able to click Launch Instances to bring up RHEL 8.
As you can see, it can take up to a minute, or two, for the instance to be brought up.

Now, you can click on Services at the top left of the screen and then select EC2 under Recently visited. Or, you can enter EC2 in the search bar to access your running instance (both methods work).
 |
 |
Ensure your new instance is selected (rh8_vm), then on the Details tab, note the value for Public IPv4 DNS. I usually keep the instance's name, public IP, private IP and public IPv4 DNS stored for easy access. We will need this to connect to the instance.

Connect to RHEL 8 instance
Now you will need an SSH client to connect to your instance. I am on Windows 10 and have installed GitBash which includes an SSH client. If you do not want to install GitBash, I also use MobaXterm Portable. It's a great tool and easy to use.
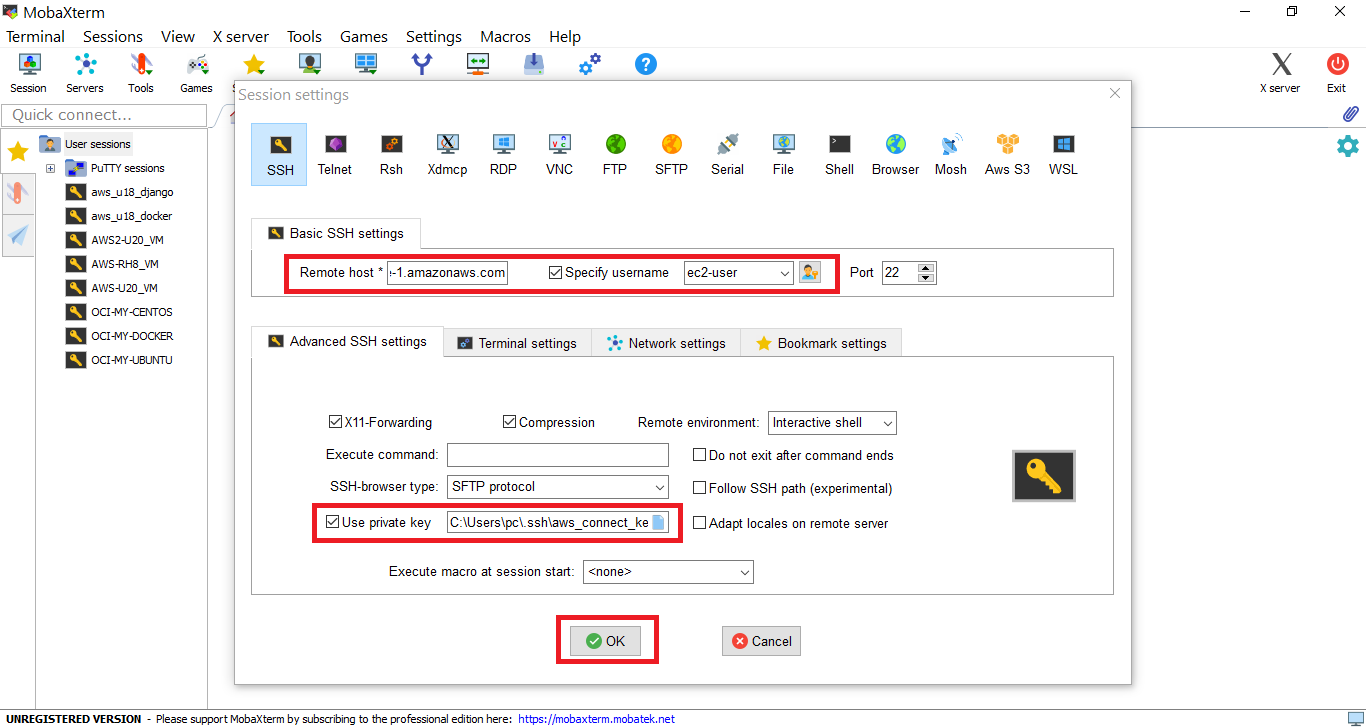
Using MobaXterm, I would first create a session by clicking the Session button in the top left corner:

Followed by clicking the SSH button.

For Remote host:, enter your Public IPv4 DNS from your instance's Details tab.
Also specify the username of ec2-user.
That is the default username for every RHEL instance created on AWS.
Then, under Advanced SSH Settings select the key that you downloaded earlier (aws_connect_keypair.pem). Finally, click OK.
Your session should open to your newly created EC2 instance running RHEL 8.

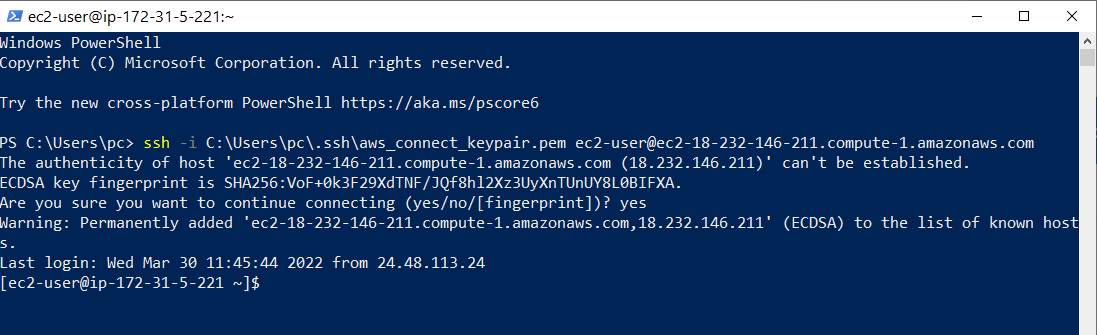
If you installed GitBash, you can open either PowerShell or a Windows command prompt.
Then, from the command line, enter the following (NOTE: make sure you enter your connection details):
ssh -i /path/my-key-pair.pem my-instance-user-name@my-instance-public-dns-name
ssh -i C:\Users\pc\.ssh\aws_connect_keypair.pem ec2-user@ec2-3-231-211-145.compute-1.amazonaws.com
Register with Red Hat Customer Portal
Red Hat subscription is a software support model followed by Red Hat for its customers. It allows customers to download software packages, patches, updates, and upgrades for Redhat Enterprise Linux. Along with software support, customers will also get technical support for the product.
After you install Redhat Enterprise Linux 8, you need to register and enable a Red Hat subscription to be able to install any packages on the system. To register for a Red Hat subscription, first, go to the Red Hat Customer Portal to create an account. Account credentials are required to enable a Red Hat subscription for your AWS RHEL 8 EC2 instance.
Once you have your account credentials, we will use the subscription-manager
command to register the RHEL 8 system. When prompted enter the username and
password you used while signing up with Red Hat.
$ sudo subscription-manager register

Now, we can attach the subscription to our RHEL 8 system.
$ sudo subscription-manager attach --auto

We will now list subscription and product information for this system.
$ sudo subscription-manager list

Finally, we will list the available package repositories to confirm that we can install packages on the system.
$ sudo yum repolist

Hopefully, you’ve enjoyed completing this tutorial and found it helpful.
Please note that the free tier allows for 750 hours per month of Amazon EC2. You can create many EC2 instances
but beware of the limit. If you go over that limit, you will pay the cost. My advice to you is to shutdown your instance/s
after you've done your work.
I have another tutorial where I demonstrate the creation of an Ubuntu 20 EC2 (Elastic Compute Cloud) instance.
If you're interested in a deb based Ubuntu 20 EC2 instance installation, you can access the tutorial here.
Finally, if need be, you can download this tutorial Create AWS RHEL 8 EC2 Instance.