Guest Additions Install
Infrastructure Tutorials
Download Guest Additions Install tutorial.
In this tutorial, I will be demonstrating the installation of VirtualBox’s Guest Additions so that you can make use of shared folders, as well as, the VBoxManage guestcontrol command to manage the guest VM from the host machine. In a future tutorial, I will demonstrate how to use the guestcontrol command in a PowerShell script to automatically start a VM, as well as, start PuTTY to open an SSH connection to the VM.
I will be performing the Guest Additions installation on a virtual machine with a CentOS 7 minimal install (no GUI).

Refer to the prerequisites listed below to access the resources needed to complete this tutorial.
Prerequisites
- VirtualBox 6.1.2 & VirtualBox 6.1.2 Extension Pack
- VirtualBox VM with a CentOS 7 minimal installation
- non-root user with sudo privileges
- Active Internet Connection

For instructions on how to install VirtualBox and extension pack, see my VirtualBox Install tutorial here.
If you do not already have a virtual machine, my other tutorial, CentOS 7 Server Install, is here.
If you already have access to a CentOS 7 minimal install VM, but do not have a non-root user with sudo privileges, my other tutorial can be accessed here.
Steps to complete tutorial:

Take Post CentOS 7 Install Snapshot
The reason I want to take a snapshot, before we begin, is that we will be making a number of major changes to the virtual machine. After successfully completing a major change, I find it helpful to create (take) a snapshot to act as a fallback mechanism. If something goes wrong during a major change, we can revert back to a working snapshot (previous stable state).
If you’ve completed my CentOS 7 Server Install tutorial, then, you’ve already taken this snapshot and can skip to the next step (Create non-root user with sudo privileges).
If you already have a CentOS 7 minimal install VM. I suggest taking a snapshot before continuing with the tutorial,to ensure that you have a starting point to revert back to.
Please note that you can name the snapshot whatever you like, just remember which snapshot is associated with which state of the virtual machine.
In the VirtualBox Manager interface, we are currently in Details view. To switch to Snapshots view, click the list icon next to the virtual machine name, and select Snapshots .

The Snapshots view will show you a listing of the snapshots created for the virtual machine.
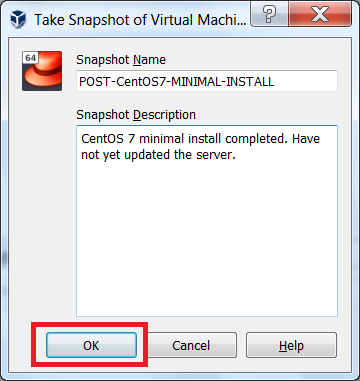
From the VirtualBox Manager’s interface, again, ensure your VM is selected, then, to create a snapshot click Take

|
Enter a name for the snapshot, as well as, a short description, I've taken a snapshot POST-CentOS7-MINIMAL-INSTALL to Before installing the Guest Additions, we will ensure that To perform a CentOS 7 system update, we need a non-root user with sudo privileges. |
|
Create non-root user with sudo privileges
If you already have a non-root user with sudo privileges, please skip to the next step Update CentOS 7
If not, please complete my other tutorial, Create Non-Root User, accessible here. Then, return here to complete this tutorial.
Update CentOS 7
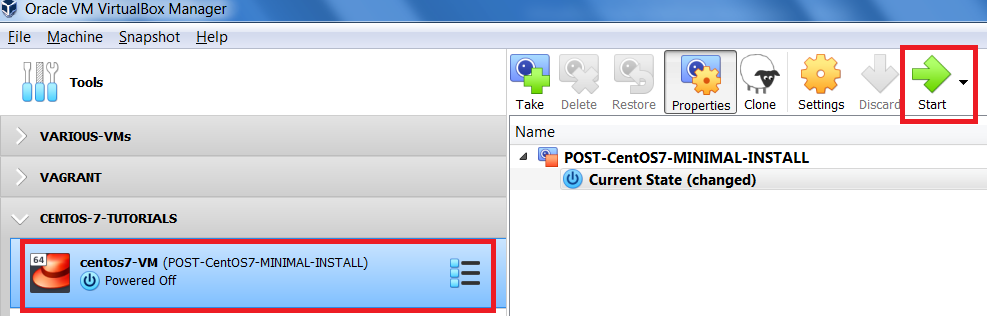
From the VirtualBox Manager interface, ensure your VM is selected and click Start
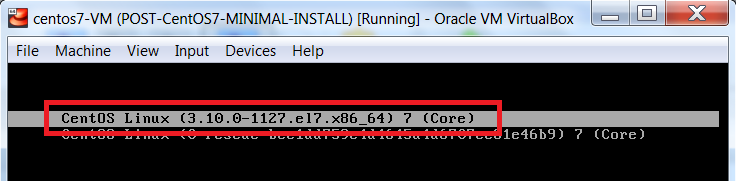
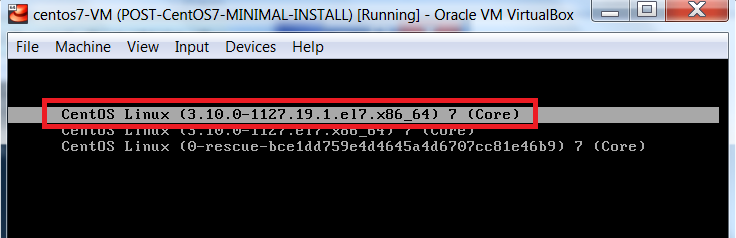
During start up, you will see which kernel is being used. Make a note of this as it will change post system update.
We will be using a non-root user with sudo privileges (wheel group member) to update our system.
Once, the virtual machine has started, login with your non-root user that has sudo privileges.
To update CentOS 7, from the command line, execute the following:
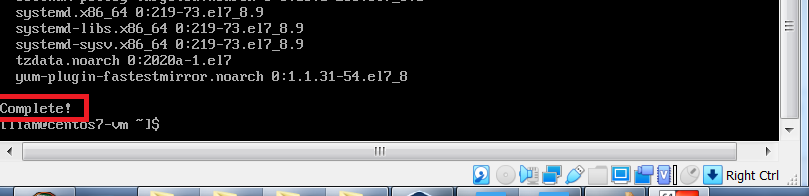
$ sudo yum update

When prompted, enter y to accept the packages to be downloaded, installed and upgraded.
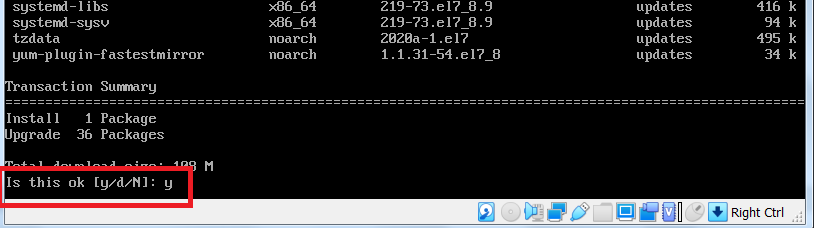
When prompted to use the local CentOS 7 Signing key to validate the downloaded packages, enter y.

Your CentOS 7 system is now up to date.
Let’s reboot to ensure the newly installed kernel will be used as the core interface between the computer's hardware and its processes.
Remember to use your non-root user’s password to acknowledge the following command:
$ sudo shutdown -r now // -r option used to reboot the system

You should notice that the newly installed kernel is now being used.
Now that our CentOS 7 install is up-to-date, let’s shutdown the VM and create another snapshot before installing VirtualBox’s Guest Additions.
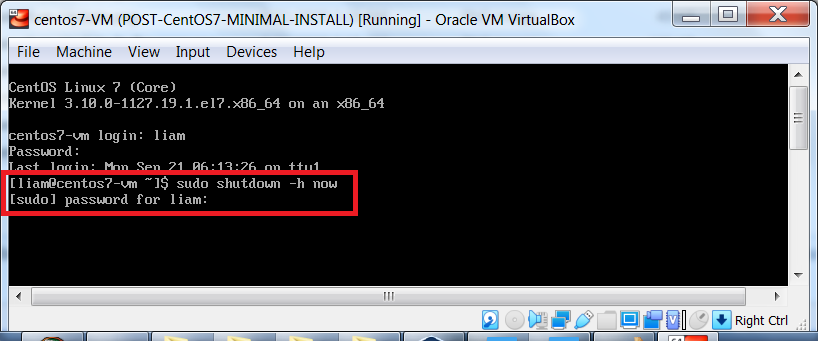
Remember to use your non-root user’s password to acknowledge the following command:
$ sudo shutdown -h now // -h option used to halt the system
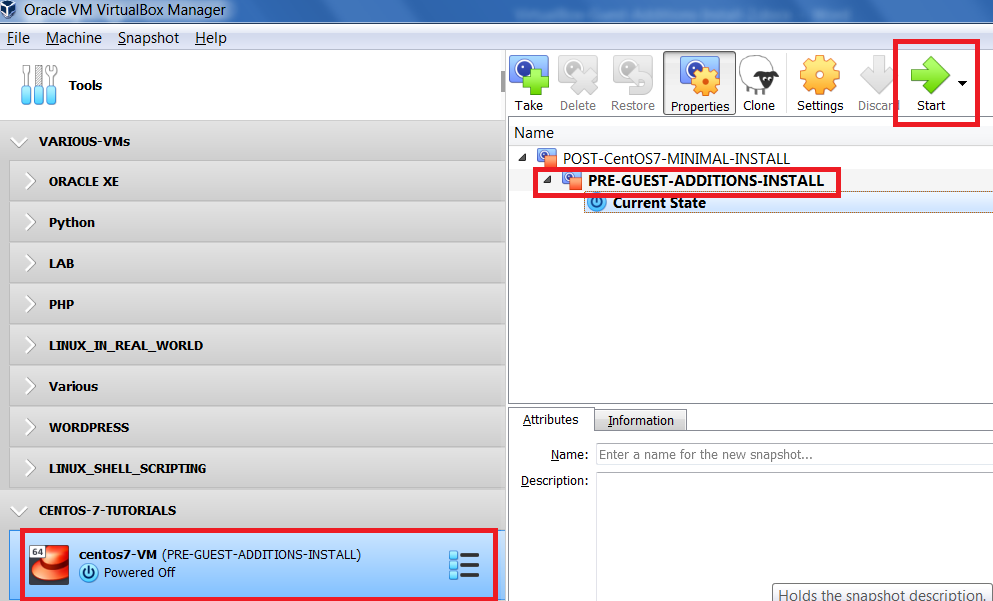
Take Pre Guest Additions Install Snapshot
From the VirtualBox Manager interface, ensure your VM is selected and you are in Snapshots view.
To create the snapshot, click Take

|
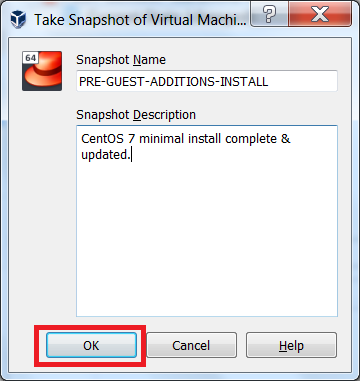
Enter a name for the snapshot, as well as, a short description, I've taken a snapshot PRE-GUEST-ADDITIONS-INSTALL to ensure that we have an updated CentOS 7 minimal install we can revert back to. Now that we have our snapshot in place, we are ready to install the Guest Additions. |
|
VirtualBox Guest Additions
In the VirtualBox Manager interface, you should now see your newly created snapshot.
Ensure your VM is selected and click Start
Prerequisite Packages Install
Before we can install VirtualBox’s Guest Additions, we will need to ensure our kernel has the corresponding kernel-headers. The kernel headers are used when you want to compile a new kernel module that interfaces directly with the kernel (in this case, the Guest Additions).
First, we will verify whether, or not, the kernel-headers exist. From the command line, execute the following:
$ uname -r // display active kernel release information
$ ls -l /etc/src/kernels // location of kernel-header files
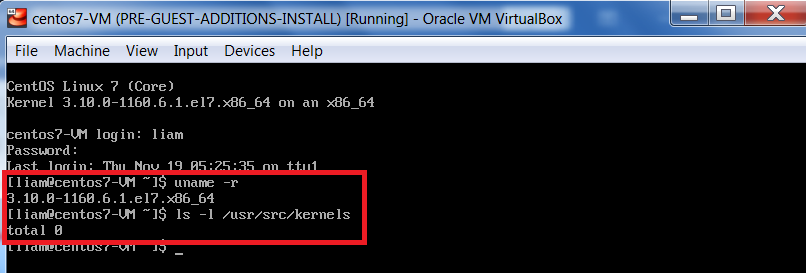
We see that no matching kernel-headers exist so we will need to install the kernel-devel package which provides
kernel-headers. To do this, execute the following:
$ sudo yum install kernel-devel

If prompted, enter your non-root user’s password to confirm command execution.
When prompted to download, and install, the package, and its dependencies, enter y (yes)


The kernel-devel package was successfully installed.
Now, we will verify that our matching kernel-headers exist by executing the following:
$ uname -r // display active kernel release information
$ ls -l /etc/src/kernels // location of kernel-header files
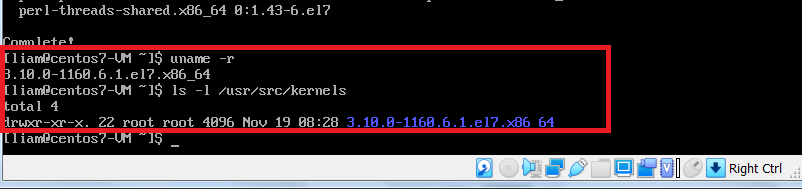
We now see the matching kernel-headers. But, before we can install VirtualBox’s Guest Additions, we also need to install a few required packages that are used during the installation of the guest additions. These packages are nicely grouped in Development Tools which provides a basic development environment that will allow you to do many things on the system, including build kernel modules, which is required for a successful installation of VirtualBox’s Guest Additions.
First to get an idea which packages are included in Development Tools, execute the following:
(Note that the less command allows for page navigation using your keyboard’s up/down, and spacebar, keys.)
$ yum groups info "Development Tools" | less


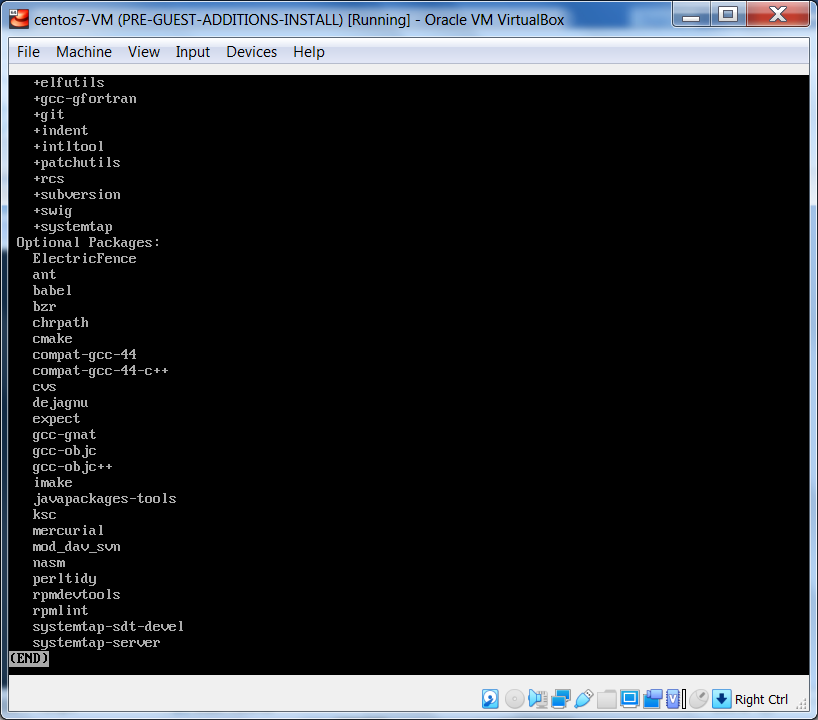
You will notice that many packages are included. Enter q to quit and return to the command line.
Now, we will install the grouped packages by executing:
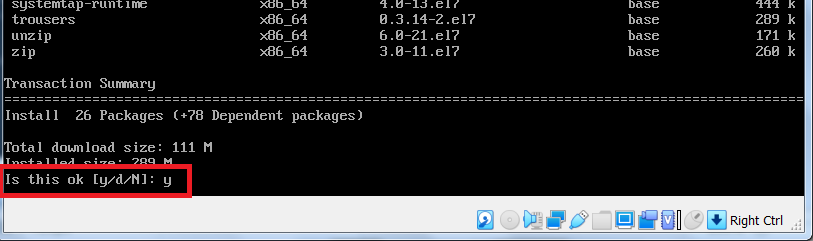
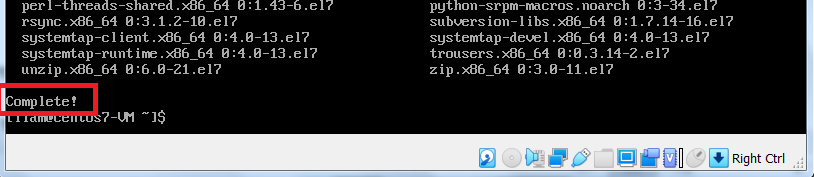
$ sudo yum groups install "Development Tools"
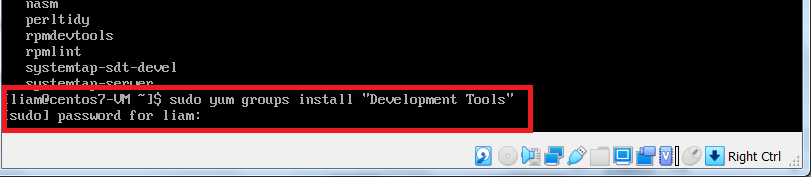
If prompted, enter your non-root user’s (in my case, liam) password to confirm command execution.
Then, when prompted to download, and install, the packages, enter y (yes).
Guest Additions Install
Now that our basic development environment is in place, we can begin the Guest Additions installation.
First, we need access to the guest VM’s main menu.

In order to access the virtual machine’s main menu, you will need to exit the guest (virtual machine) interface by hitting your Host key. Check the bottom right-hand corner of the virtual machine's interface to determine what your Host key is. For my Windows 7 host machine, my Host key is the right Ctrl key (see image below).

Now you know how to exit the guest interface to access your virtual machine’s main menu.
From the virtual machine’s main menu, select Devices, then click Insert Guest Additions CD image

Now that we’ve inserted the Guest Additions CD image, we will have to mount the CD image so that we can access its contents to perform the installation. To do this, execute the following commands (one after the other):
$ sudo mount /dev/cdrom /media // mount CD image to an existing directory
$ cd /media // change to that directory
$ ls -l // view the contents of the mounted CD image

Finally, execute the following:
$ sudo ./VBoxLinuxAdditions.run // install Guest Additions, for a Linux guest, by
// executing the script

The Guest Additions were successfully installed. We can verify that the kernel modules needed by the Guest Additions have been successfully built by executing the following command:
$ lsmod | grep -i vbox // lsmod shows the status of modules in the Linux kernel

After installing VirtualBox’s Guest Additions, it’s a good idea to reboot the system to ensure all system changes take effect.
From the command line, execute the following:
$ sudo shutdown -r now

Test Guest Additions Features
Since we are in a minimal server environment, it is difficult to test out added features such as the Shared Clipboard or
Drag ‘n Drop. But we can test access to shared folders, which provide access to host machine resources and can be very handy. Furthermore, we can test our ability to control the VM from our host machine. This can be accomplished using the VBoxManage guestcontrol command.
Shared Folders
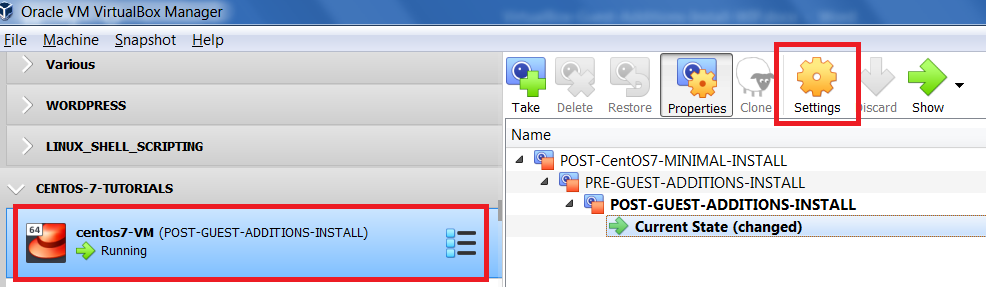
Our first test will be to create a shared folder using the VM’s settings dialog box. Since your VM is currently running, switch back to the VirtualBox Management interface, ensure your running VM is selected and click the Settings button, as indicated below.
In the VM Settings dialog box, on the left, select Shared Folders. You’ll notice, on the right, that there are no shared folders. To create a shared folder, click the icon that Adds new shared folder.

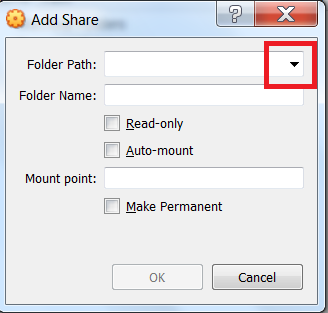
Once the Add Share dialog box opens, click the drop-down next to Folder Path: and click Other.
|

|
You will now select which folder on your host machine that you would like to share with your guest VM. Select your folder (will be different than mine) and click Select Folder.

|
Once you’ve selected your shared folder, the Add Share dialog box reappears. Check both the Auto-mount and Make Permanent checkboxes. This will ensure that the shared folder will be available to the guest VM whenever the virtual machine is running. Finally, to create the shared folder, click OK |

|
From the guest VM’s settings dialog box we can see our newly created shared folder. To continue, click OK

Now that we have created a shared folder, let’s confirm that it is available to the guest VM.
Return to the guest VM’s interface and execute the following commands:
$ ls -l /media // storage location for shared folders
$ mount | grep "sf_1-LINUX*" // verify that shared folder is now mounted to guest VM
// note, ‘sf_’ prepended to the shared folder name

Please note in the image above that the root user is the owner of the shared folder, while membership in the vboxsf group is required to access the shared folder. We will prove that by attempting to change directories to the shared folder as a non-root user (in my case liam) that is not a member of the vboxsf group.
As your non-root user, execute:
$ id // display user account information, including group membership
$ cd /media/sf_1-LINUX-CONFIG // ‘vboxsf’ group membership required to access shared folder
// (Please note that your shared folder name will be
// different than mine)

We will change our non-root user’s group membership. Then, instead of having to logout to force the update of the non-root user’s group membership, we will use the su (switch user) command with the environment variable $USER (refers to current active user) to switch to the SAME user (again, in my case, liam), by executing the following:
$ sudo usermod -aG vboxsf liam // add non-root user to ‘vboxsf’ group
$ su - $USER // switch user to SAME active user
// to update group membership
$ id // display account info, including group membership
$ cd /media/sf_1-LINUX-CONFIG // confirm that access has been granted
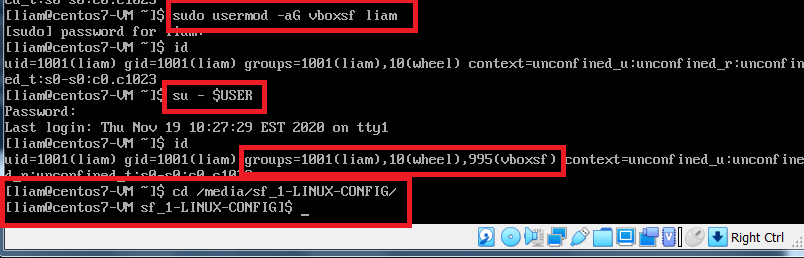
The non-root user was added to the vboxsf group and is now able to access the shared folder. This non-root user will also be able to access any other shared folders that are created for this virtual machine.
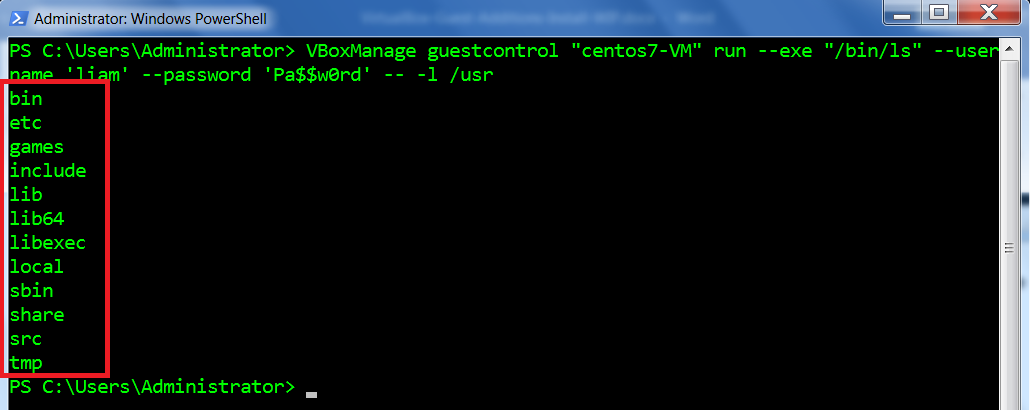
Now, we will perform a simple test to ensure we can execute commands on the guest VM from the host machine.
Remote VM Management
To perform our test, open PowerShell and execute the entire command on a single line. The following command will list the contents of the /usr directory of our CentOS 7 VM. (use your non-root username & password)
VBoxManage guestcontrol "centos7-VM" run --exe "/bin/ls" --username 'username' --password 'password' -- -l /usr
We have successfully installed the VirtualBox Guest Additions for a CentOS 7 minimal install and confirmed that we can create, and access, shared folders, as well as, execute commands on the guest VM from the host machine.
Now would be a good time to take a snapshot. That way, if we ever need a CentOS 7 server virtual machine that already has VirtualBox's Guest Additions installed, we can clone this snapshot in seconds.
From the command line, execute the following:
$ sudo shutdown -h now

Take Post Guest Additions Snapshot
From the VirtualBox Manager, ensure your VM is selected and you are in Snapshots view, then, click Take

|
Enter a name for the snapshot, as well as, a short description, then, click OK I've taken a snapshot POST-GUEST-ADDITIONS-INSTALL to ensure that we have a CentOS 7 server VM that has VirtualBox's Guest Additions installed, which can be cloned for future use. |

|

We have successfully installed VirtualBox’s Guest Additions on a CentOS 7 minimal install VM.
Along the way we created a couple of snapshots to act as fallback mechanisms. At any time, if a virtual machine becomes unresponsive, we can always revert back to a working snapshot. We can also clone a snapshot, as long as, the snapshot was taken when the virtual machine was powered off.
Hopefully, you’ve enjoyed completing this tutorial and found it helpful.
If you would like to see my other tutorials, they can be accessed here.
Finally, if need be, you can download this tutorial Guest Additions Install.