PuTTY Passwordless SSH Connection
Infrastructure Tutorials
Download PuTTY Passwordless SSH tutorial.
In this tutorial, I will demonstrate how to create a passwordless SSH connection from my Windows 7 host system to a CentOS 7 virtual machine.
I will be using PuTTYgen to generate my SSH key pair and PuTTY to remotely connect to my CentOS 7 VM.
Please note that I will be using a virtual machine that was created in my other tutorial, CentOS 7 Server Install, accessible here.

Prerequisites
- VirtualBox VM with a CentOS 7 minimal install
- PuTTY & PuTTYgen (can be downloaded here)
- PuTTY: client for managing SSH sessions
- PuTTYgen: tool for managing & creating SSH key pairs
- Active Internet Connection
For instructions on how to install VirtualBox and extension pack, see my VirtualBox Install tutorial here.
If you do not already have a virtual machine, with a minimal install of CentOS 7, my other tutorial, CentOS 7 Server Install, can be accessed here.
Steps to complete tutorial:
- Take Pre Passwordless SSH Snapshot
- Download PuTTY & PuTTYgen
- Generate SSH Keypair using PuTTYgen
- Configure CentOS 7 VM
- Start CentOS 7 VM
- Configure Port Forwarding
- Connect to VM using PuTTY
- Install Public SSH Key on VM
- Configure PuTTY Session
- PuTTY Passwordless SSH Connection to VM
- Take Post Passwordless SSH Snapshot
Take Pre Passwordless SSH Snapshot
The reason I want to take a snapshot, before we begin, is that we will be making a number of major changes to the virtual machine.
After successfully completing a major change, I find it helpful to create (take) a snapshot to act as a fallback mechanism. If something goes wrong during a major change, we can revert back to a working snapshot (previous stable state).
If you’ve completed my CentOS 7 Server Install tutorial, accessible here, then, you’ve already taken a snapshot
(POST-CentOS7-MINIMAL-INSTALL) and can skip to the next step (Download PuTTY & PuTTYgen).
If you already have a CentOS 7 minimal install VM. I suggest taking a snapshot before continuing with the tutorial, to ensure that you have a starting point to revert back to.
Please note that you can name the snapshot whatever you like, just remember which snapshot is associated with which state of the virtual machine.
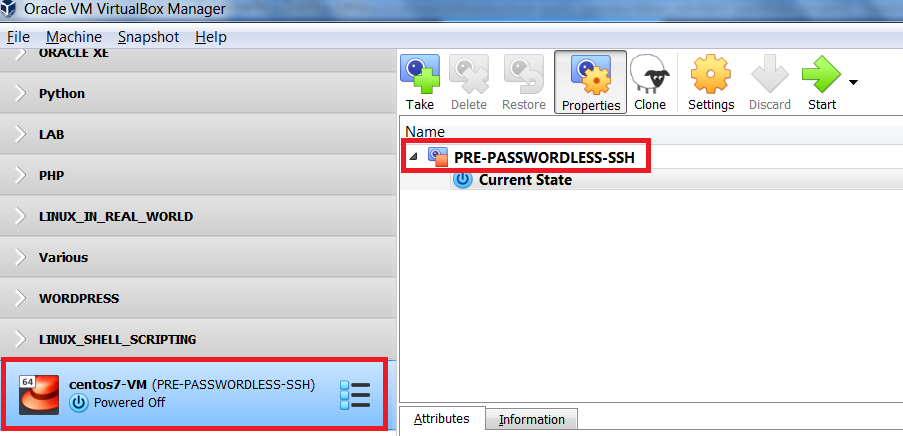
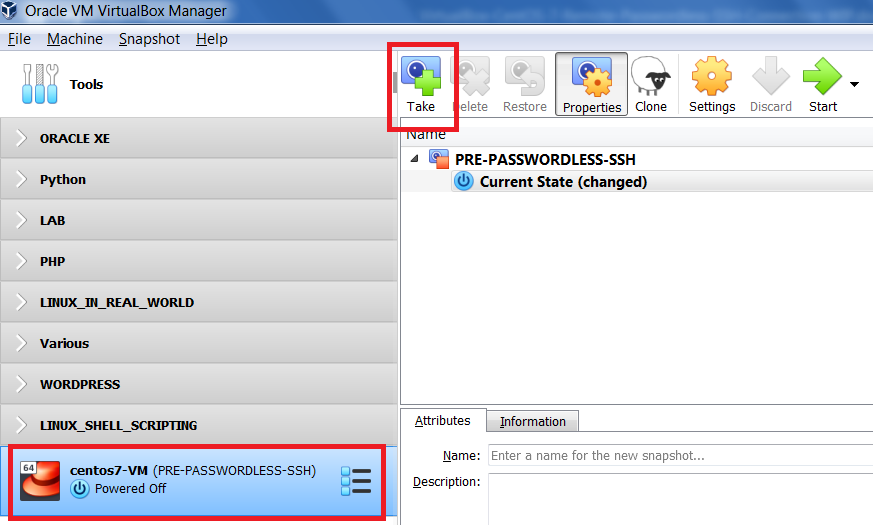
From the VirtualBox Manager interface, ensure your VM is selected and that you are in Snapshots view.
If you are in Details view, switch to Snapshots view, by clicking the list icon next to the virtual machine name, and selecting Snapshots.
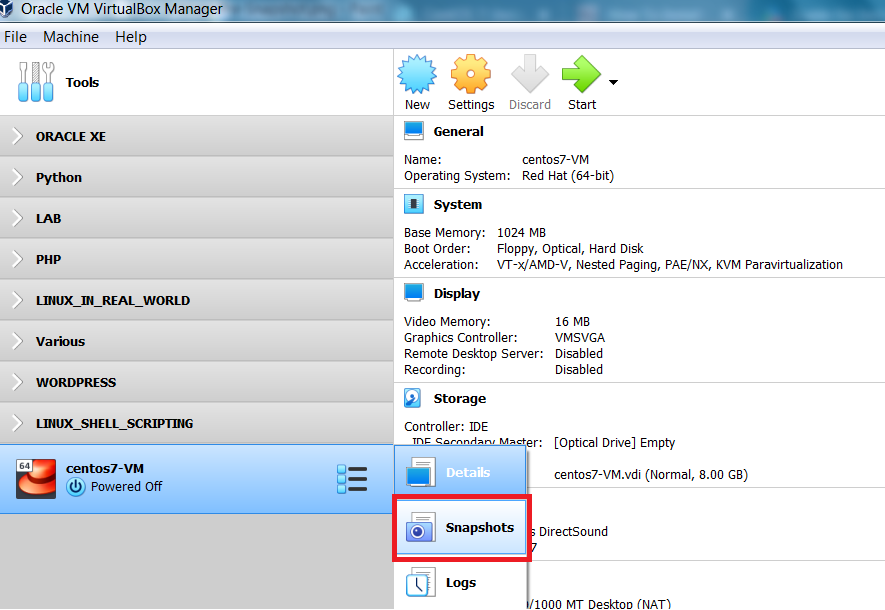
The Snapshots view will show you a listing of the snapshots created for the virtual machine.
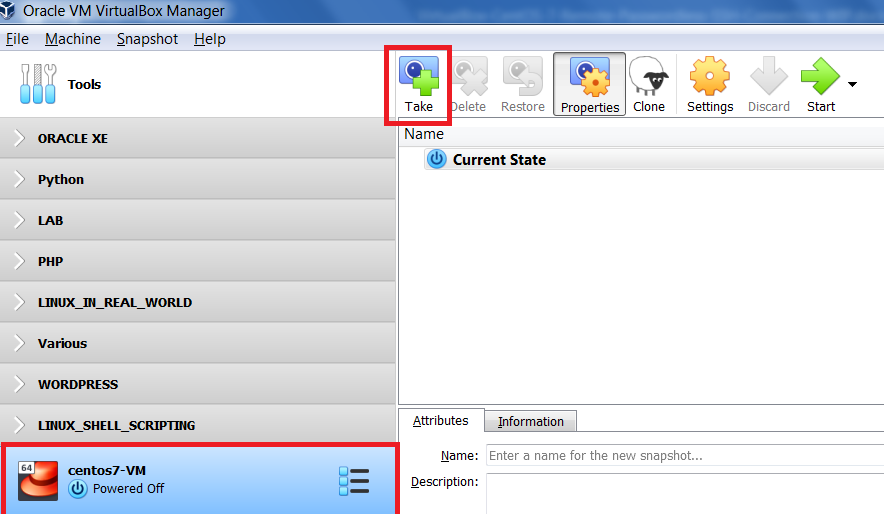
To create a snapshot, click Take
|
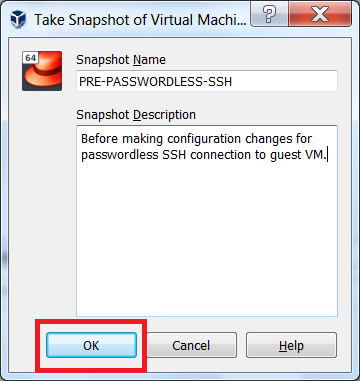
Enter a name for the snapshot, as well as, a short description, I've taken a snapshot PRE-PASSWORDLESS-SSH to ensure Before starting, and configuring, the VM, we will download the
|
|
We have successfully created (taken) a snapshot and can now download the required tools.
Download PuTTY & PuTTYgen
For both the PuTTY & PuTTYgen tools, go to the following link Download latest.
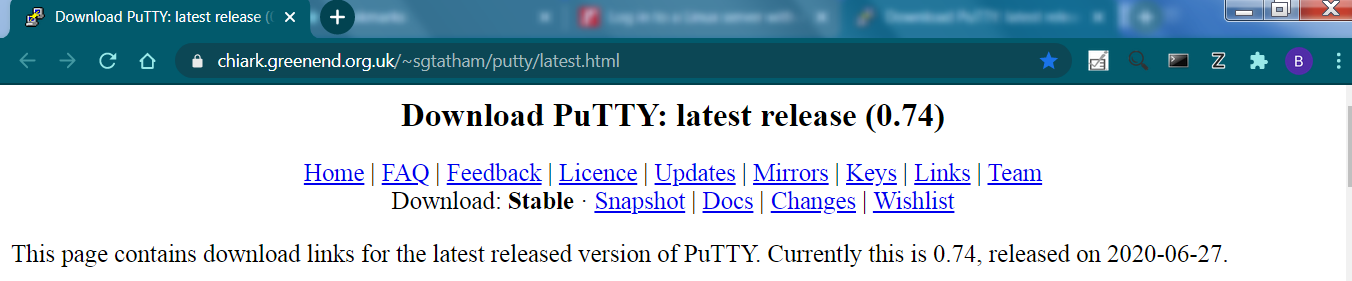
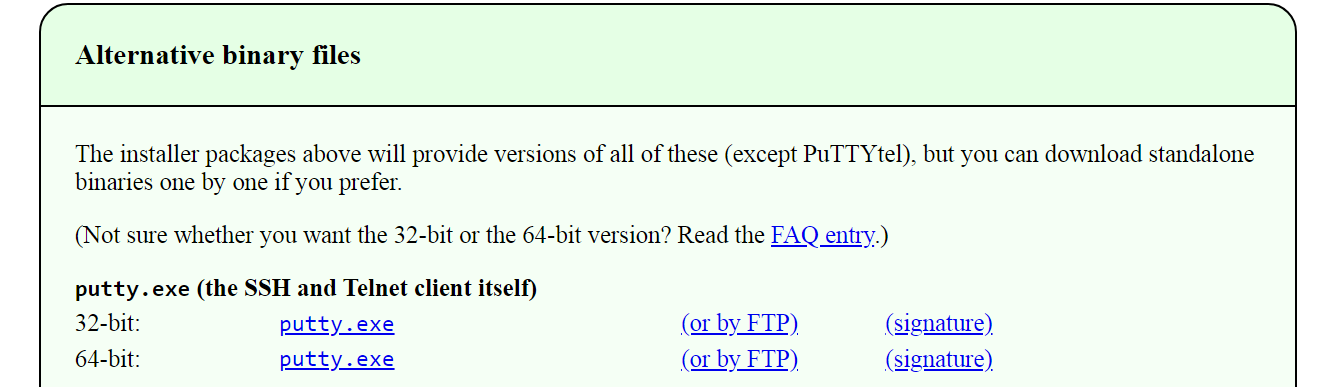
Scroll down to Alternative binary files and download the standalone binaries (portable versions – no installation required)
for PuTTY & PuTTYgen that correspond to the bit version of your system (32-bit or 64-bit).
I will be downloading, and using, the 64-bit portable versions. If you are using a 32-bit system, please download, and use,
the 32-bit portable version of PuTTY & PuTTYgen.

Once the tools are downloaded, we are ready to begin.
Generate SSH Keypair using PuTTYgen
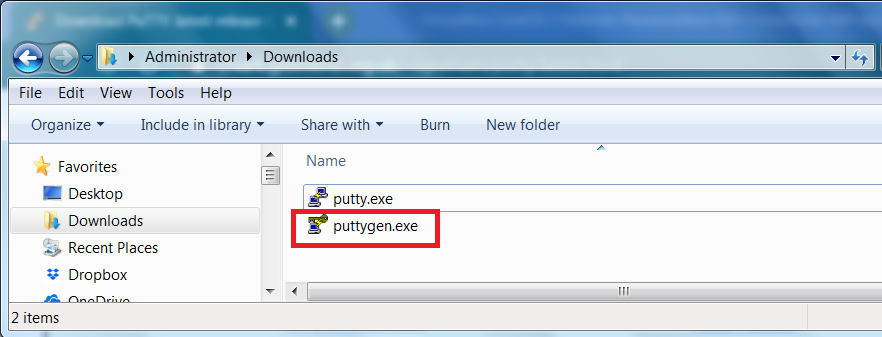
From your system’s download location, launch the PuTTY Key Generator by double-clicking puttygen.exe.
If you are prompted to accept a security warning to continue, click Run

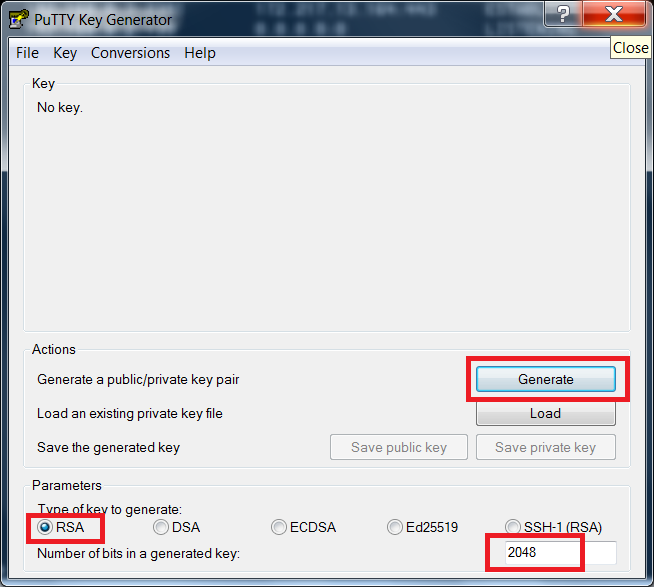
Once the PuttyGen tool opens, ensure the following (see screenshot on bottom left):
- Type of key to generate is set to: RSA
- Number of bits in a generated key is set to: 2048
|
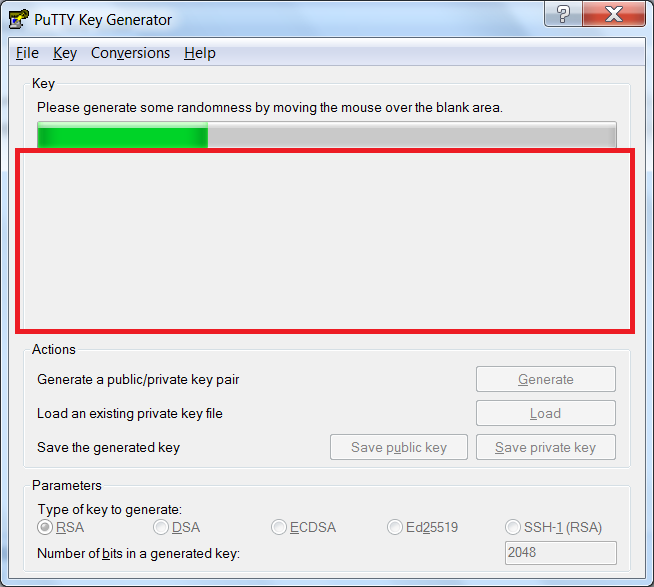
Click Generate to generate the key pair |
After clicking Generate, move the mouse around the blank area randomly. This adds randomness to the key pair to make it harder to crack. |
|
|
The SSH key pair was successfully created.
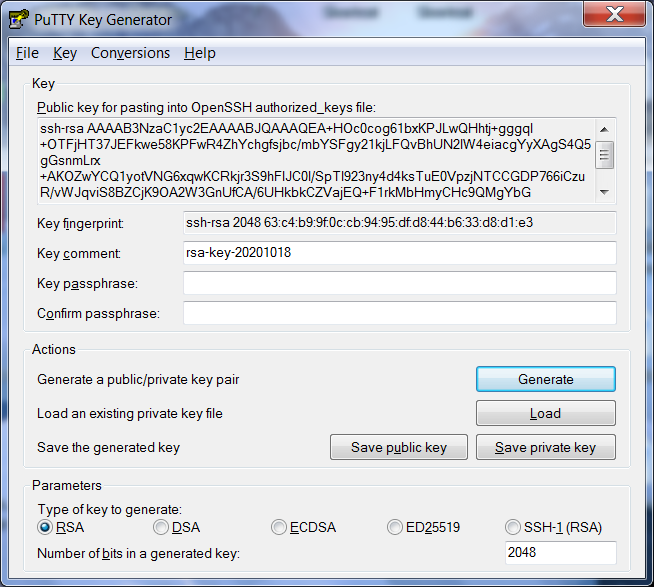
After the key pair is generated, we will need to copy the Public key for pasting into the OpenSSH authorized_keys file.
Select all of the text in the area marked below and copy it to your clipboard.
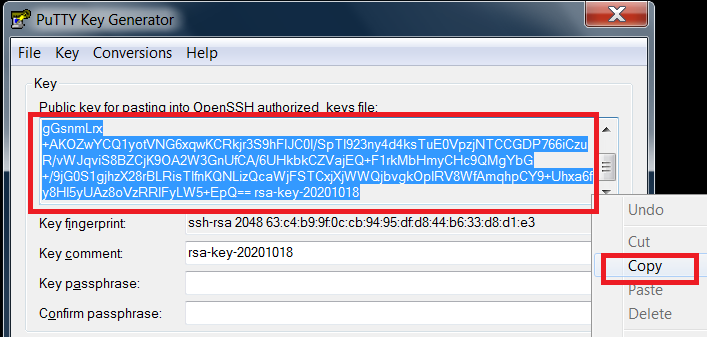
Next, open Notepad and paste the contents of your clipboard into an empty file.
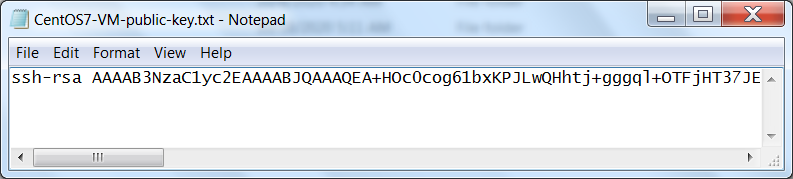
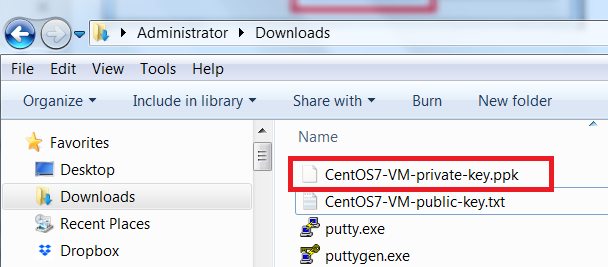
Save the file for future use (I saved it to my
Downloads directory as
CentOS7-VM-public-key.txt).
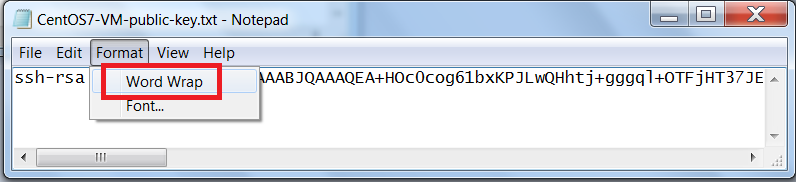
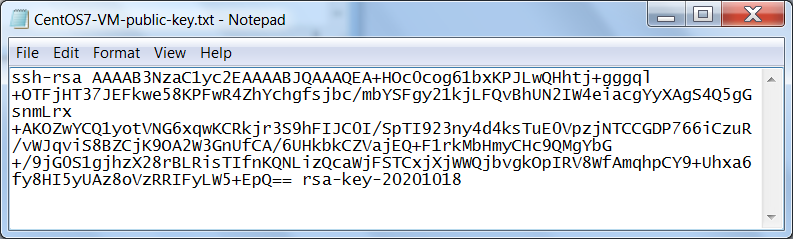
You will notice that there are no line breaks in the file. To view the full contents of the file, click
Format -> Word Wrap
Now, return to the PuTTYgen tool and click Save private key
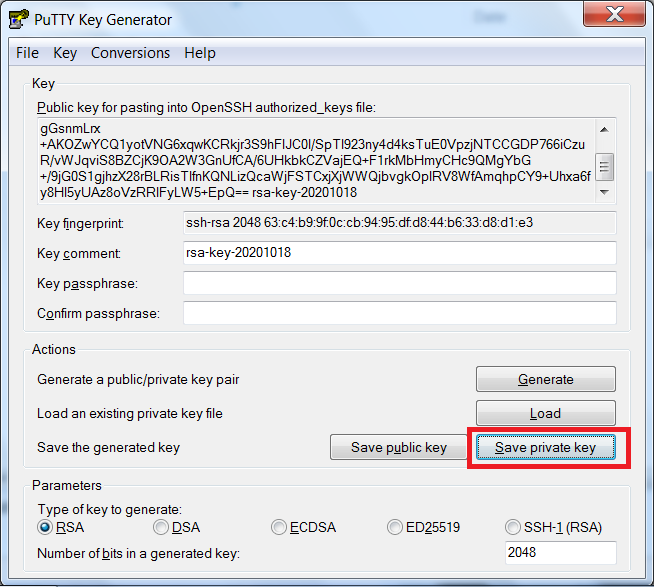
We will not be using a Passphrase, so click Yes
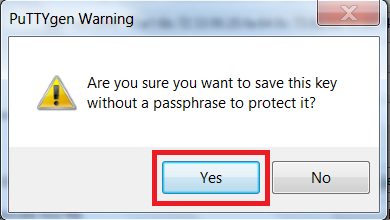
Save the file for future use (I saved it to my Downloads directory as CentOS7-VM-private-key.ppk).
Now that we have our SSH key pair, we can configure our VM to use the Public SSH key, of that key pair, to enable
passwordless SSH connections.
Configure CentOS 7 VM
Using VirtualBox's default network adapter type of NAT will assign the VM an IP address, subnet mask and default gateway,
on a different
network than our host machine, using VirtualBox’s DHCP Service.
Port forwarding allows us to map one IP address and port from our host to an IP address and port on the
guest VM.
First, we will need to start our VM and determine which IP address has been assigned. After we identify the IP address, we can
proceed with configuring port forwarding to allow an SSH connection from the host machine to the guest VM. Please note that
the initial SSH connection, from host to guest, will require a password. Then, after making the necessary changes, our second,
and subsequent, SSH connections will not require a password.
Start CentOS 7 VM
From the VirtualBox Manager interface, ensure your VM is selected and Start

When the CentOS 7 VM has started, enter your user’s credentials to login.
Then, to determine the IP address assigned to the VM, on the command line, execute the following:
ip addr show
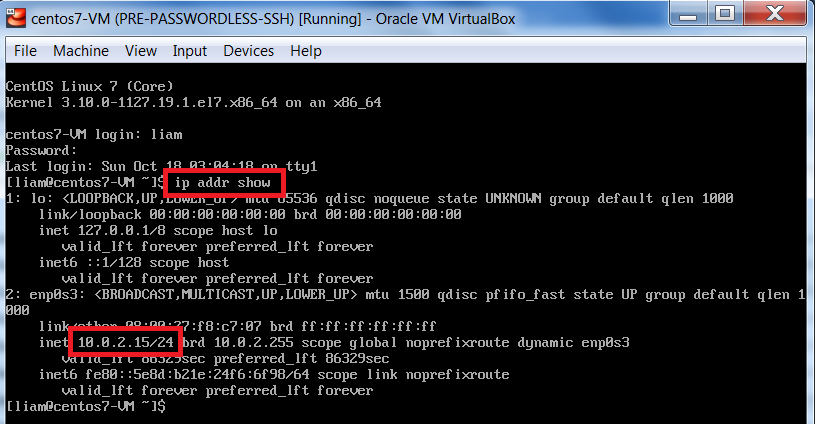
Now that we have the VM’s IP address, we can configure port forwarding.
Configure Port Forwarding
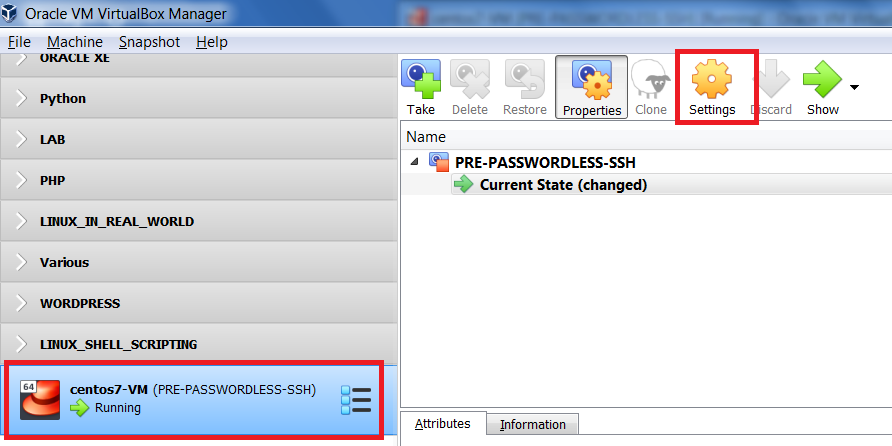
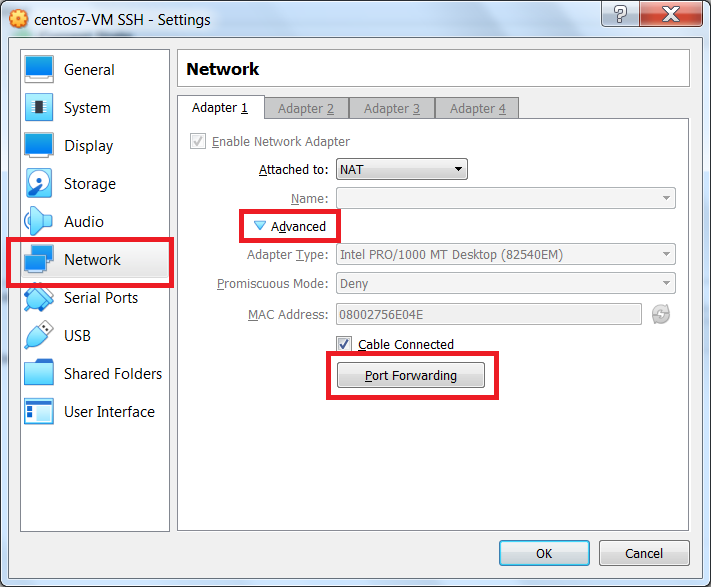
Return to the VirtualBox Manager interface, ensure your running VM is selected and click Settings
On the left, ensure Network is selected. Under Network -> Adapter 1, click the Advanced drop down to display all
of the network adapter settings. Then, click the Port Forwarding button.
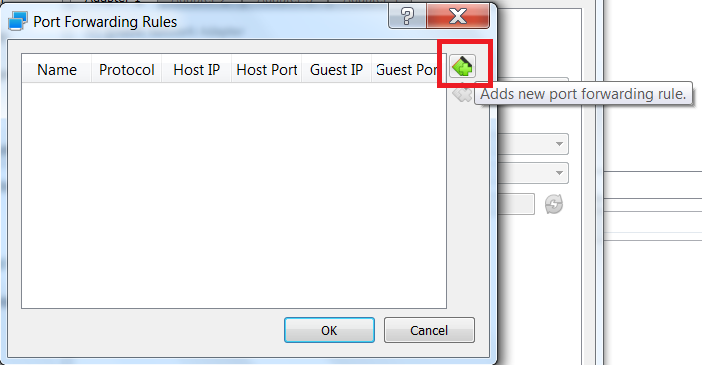
On the Port Forwarding Rules screen, to add a rule, click the green plus + button.
|
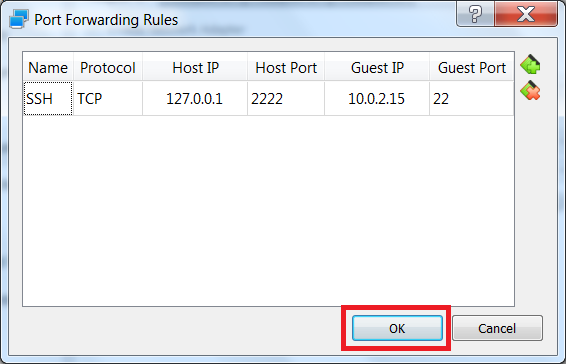
On the Port Forwarding Rules screen, enter the following:
Please note that your Guest IP could be different than mine. To create the rule, click OK |
|
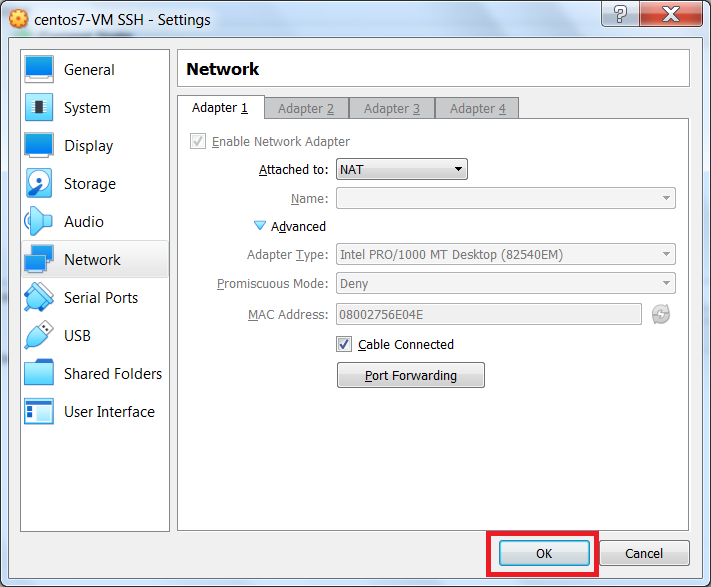
We have successfully created our port forwarding rule. To continue, click OK
Connect to VM using PuTTY
Now we will test our SSH connection to our CentOS 7 VM using PuTTY.
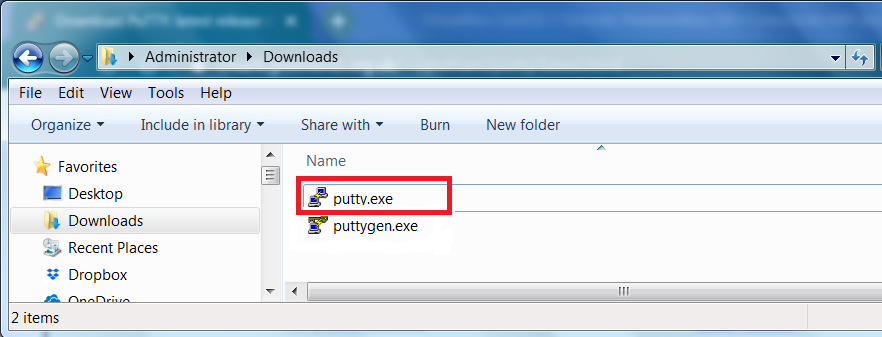
From your system’s download location, launch PuTTY by double-clicking putty.exe.
If you are prompted to accept a security warning to continue, click Run

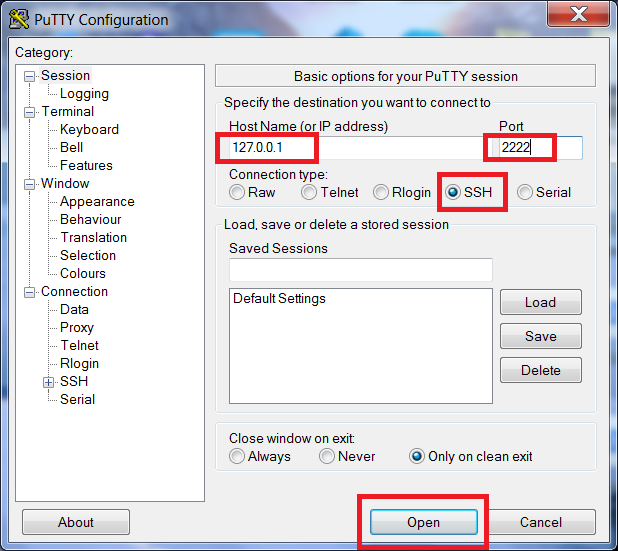
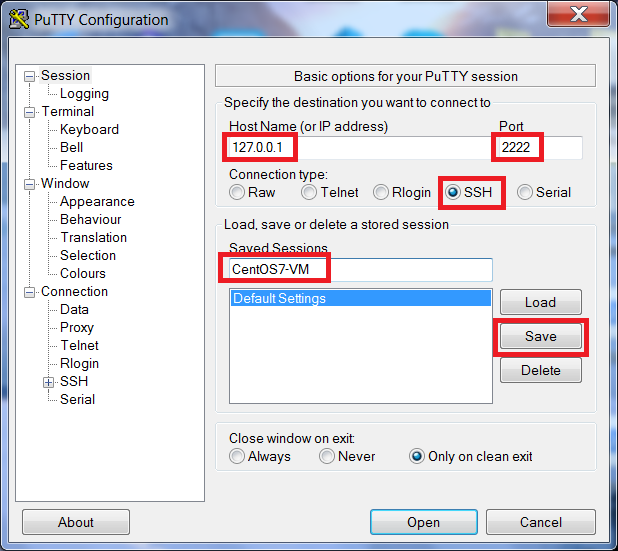
Once PuTTY opens, enter an IP address of 127.0.0.1, Port 2222 and ensure the Connection type is SSH.
Then, to open the session, click Open
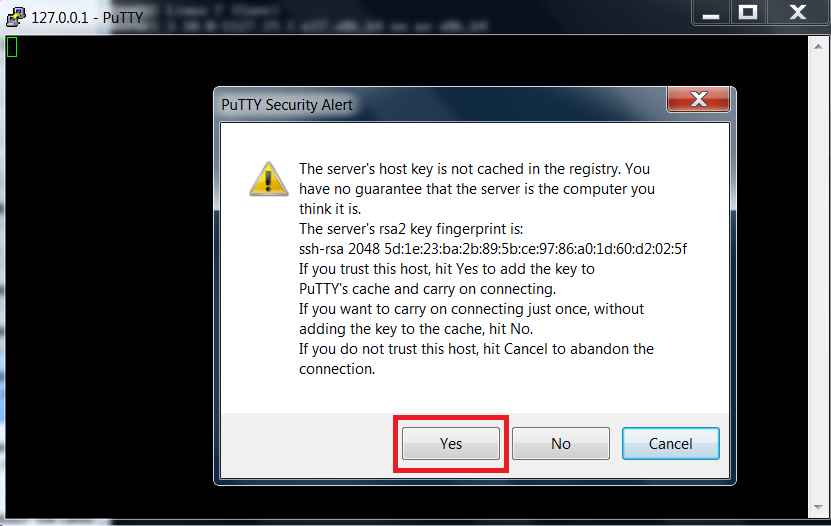
Because this is your first SSH connection to the guest VM, you will be prompted to trust the server’s (VM’s) host key. The server’s host key refers to the server’s public SSH key.
To continue, click Yes
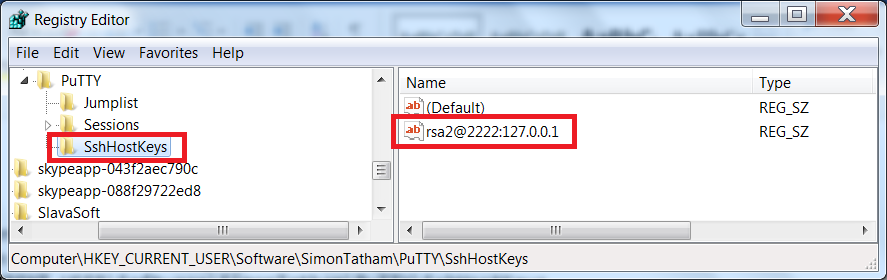
After trusting the server (clicking Yes), you will not be prompted with this message again because the server’s host key will be stored in your host machine’s registry at the following location:
HKEY_CURRENT_USER\Software\SimonTatham\PuTTY\SshHostKeys
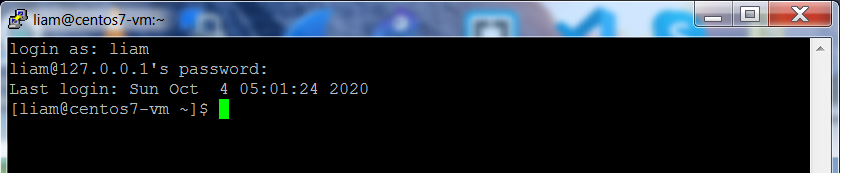
After the session opens, enter your non-root user’s credentials to login. In my case, when I installed CentOS 7 in my
virtual machine, I created a non-root user, that has sudo privileges (made administrator), with a username of liam.
Install Public SSH Key on VM
Now that we are logged in, we can install our Public SSH key on our CentOS 7 VM. To do this, we will need to create
the required directory, as well as, create, and populate, the authorized_keys file with our Public SSH key. This is needed
for passwordless authentication using SSH.
From the command line, to create the directory and set it’s permissions, execute the following:
mkdir .ssh
chmod 700 .ssh
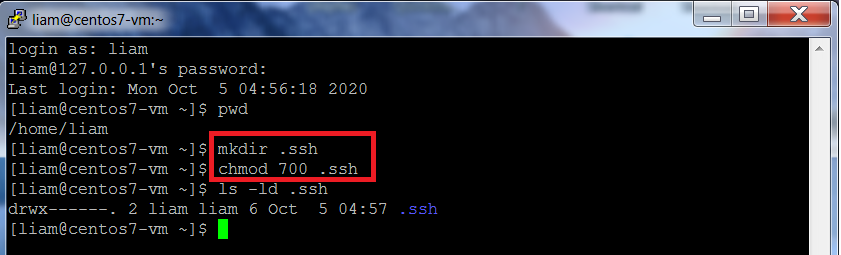
The directory has been created and restrictive permissions have been set (only owner has full access).
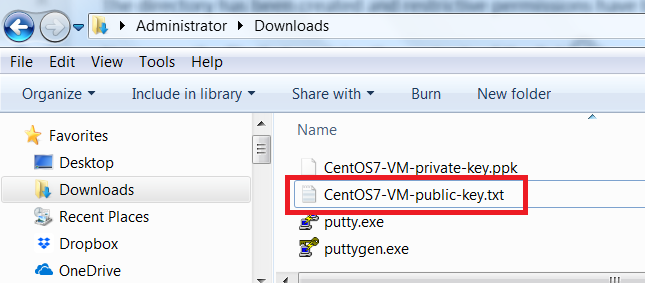
Now open the file that contains the contents of the Public SSH key we created earlier.
(in my case, I saved it to my Downloads directory as CentOS7-VM-public-key.txt)
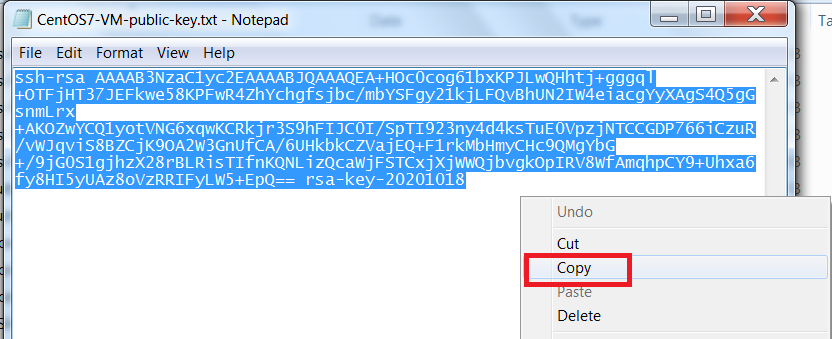
Ensure all of the file’s contents is selected, then, right-click and click Copy. This will copy the file contents to your clipboard.
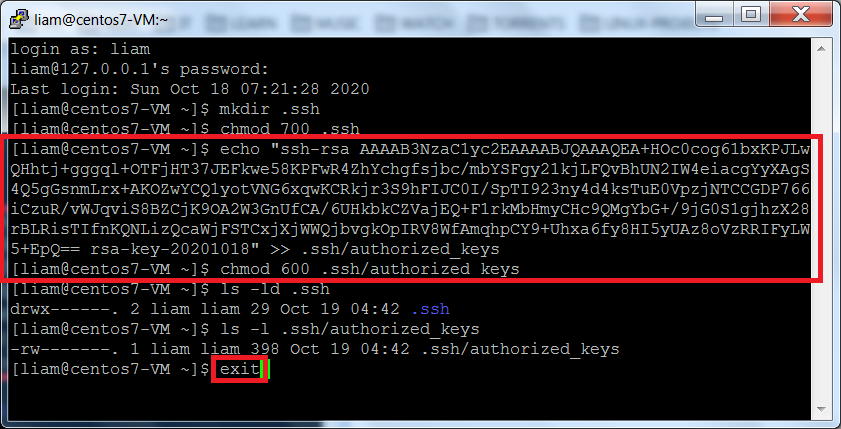
Return to your PuTTY session, and execute the following, (using the contents you just copied to your clipboard):
Please note, do not use my Public SSH key that is below (just wanted to provide you with an example) but,
enter your Public SSH key between quotes:
echo "your_Public_SSH_key" >> .ssh/authorized_keys
echo "ssh-rsa AAAAB3NzaC1yc2EAAAABJQAAAQEA+HOc0cog61bxKPJLwQHhtj+gggql+OTFjHT37JEFkwe5
wR4ZhYchgfsjbc/mbYSFgy21kjLFQvBhUN2IW4eiacgYyXAgS4Q5gGsnmLrx+AKOZwYCQ1yotVNG6xqwKCRkjr
3S9hFIJC0I/SpTI923ny4d4ksTuE0jNTCCGDP766iCzuR/vWJqviS8BZCjK9OA2W3GnUfCA/6UHkbkCZVajEQ+
F1rkMbHmyCHc9QMgYbG+/9jG0S1gjhzX28rBLRisTIfnKQNLizQcaWjFSTCxjXjWWQjbvgkOpIRV8WfAmqhpCY
9+Uhxa6fy8HI5yUAz8oVzRRIFyLW5+EpQ== rsa-key-20201018" >> .ssh/authorized_keys
After creating the authorized_keys file, set restrictive permissions on the file by executing the following:
chmod 600 .ssh/authorized_keys
Finally, close your PuTTY session, by executing:
exit
Configure PuTTY Session
Now we need to configure a Putty session for passwordless authentication using SSH.
It involves these steps:
- Step 1: create a Putty session
- Step 2: set default username for the Putty session
- Step 3: attach the SSH private key to session
- Step 4: save the session
Step 1: create a Putty session
|
First, locate where you downloaded PuTTY and launch it by double-clicking putty.exe.
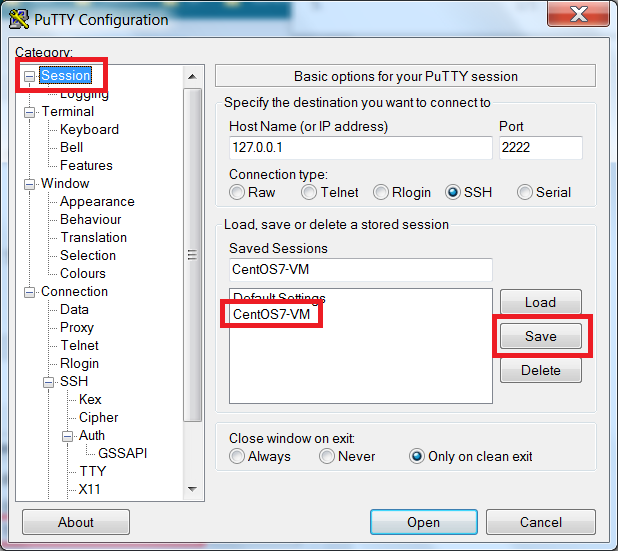
To create a session, enter the following: Under Saved Sessions, enter a name you will remember. I entered CentOS7-VM. Then, click Save |
|
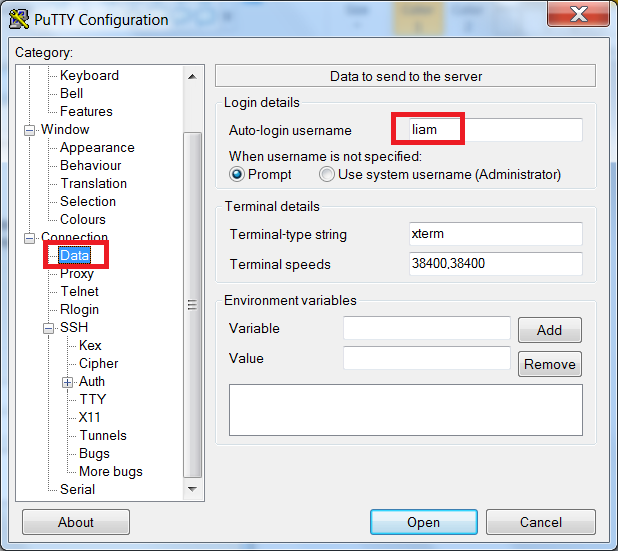
Step 2: set default username for the Putty session
|
Now, on the left hand side, under Under Login Details, set the Auto-login username to the same user used to complete the previous section -> In my case, the user liam:
User liam is the owner of both the directory and the file. |
|
Step 3: attach the SSH private key to session
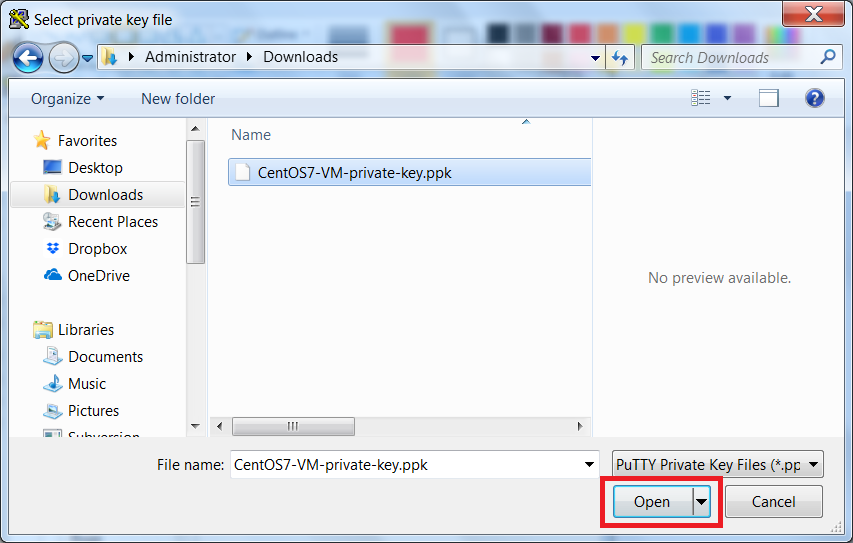
Navigate to Connection -> SSH -> Auth and click the Browse button to locate the private key saved earlier.
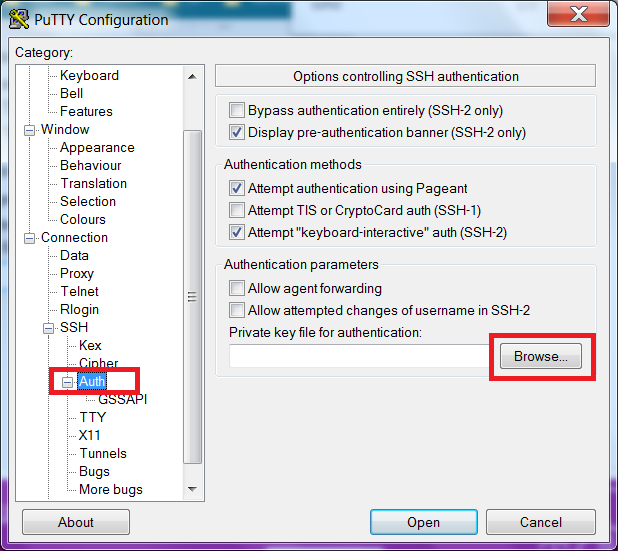
Locate your private key and click Open
Step 4: save the session
After making the necessary session changes to allow for passwordless authentication, on the left, under Category:,
click Session, then, click Save
We are now ready to open a PuTTY session using our SSH key pair to authenticate (no password required).
PuTTY Passwordless SSH Connection to VM
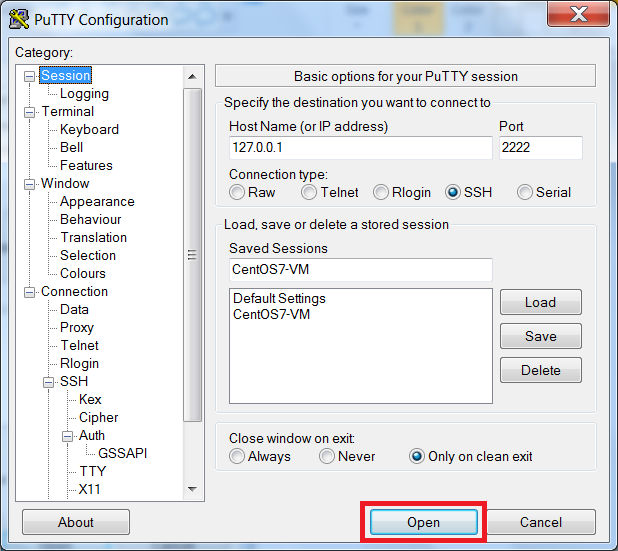
From PuTTY’s main window, ensure your newly created session is loaded and click Open.
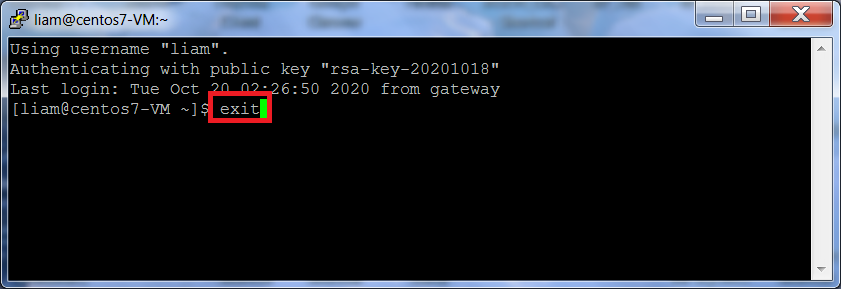
You should see Authenticating with public key
"your_Public_key_comment". Refer back to the
Generate SSH Key Pair using Putty section for SSH key pair information (i.e. PuTTY Key Generator – Key Comment field).
Also, please note that your SSH key pair information will be different than my SSH key pair information.
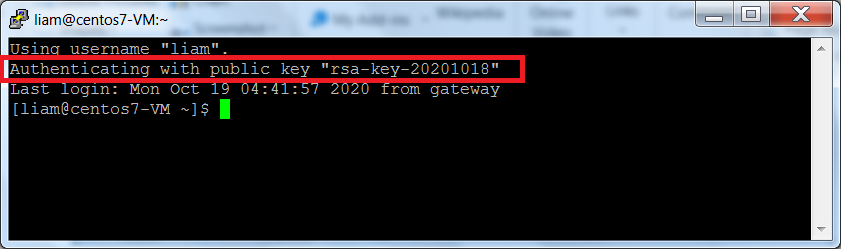
We have used the PuTTY SSH client to successfully connect to our CentOS 7 VM without providing a password.
To finish the tutorial, we will take a snapshot to save our changes for future use.
To close the PuTTY session, execute the following command:
exit
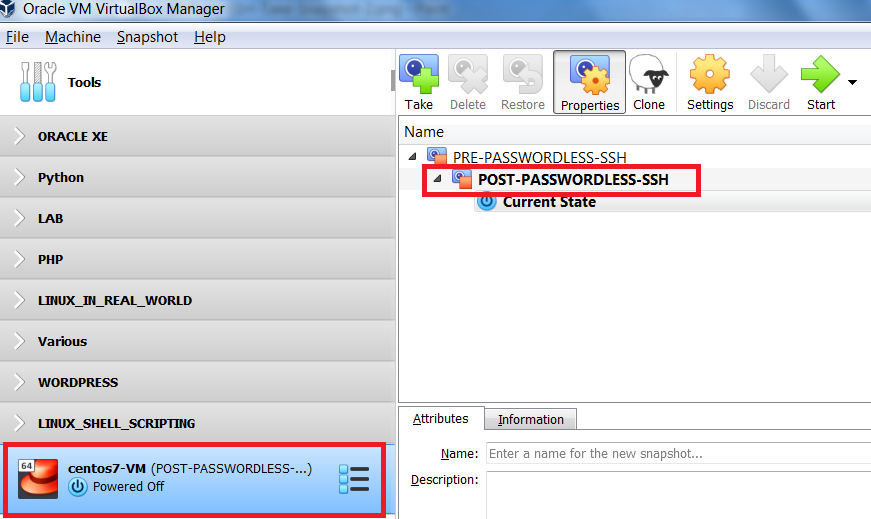
Take Post Passwordless SSH Snapshot
From the VirtualBox Manager interface, ensure your VM is selected and that you are in Snapshots view.
To create a snapshot, click Take
|
Enter a name for the snapshot, as well as, a short description, I've taken a snapshot POST-PASSWORDLESS-SSH to ensure This will come in handy whenever I need to connect to this |

|
Hopefully, you’ve enjoyed completing this tutorial and found it helpful.
You can access all of my tutorials here.
Or, if need be, you can download this tutorial PuTTY Passwordless SSH.