CentOS 7 Server Install with GUI (MATE Desktop)
Infrastructure Tutorials
Download CentOS 7 Server Install with GUI tutorial.
In this tutorial, I will demonstrate how to install the MATE Desktop on a CentOS 7 minimal install virtual machine. The MATE Desktop uses minimal system resources. This will ensure the virtual machine will only need 1024MB (1.0GB) of RAM and your host system will only need to delegate a minimum amount of resources when the VM is running.
After the MATE Desktop install demo, I will show you how to install VirtualBox’s Guest Additions so that you can make use of a shared clipboard and drag’n’drop between host and guest. These are the two features I use regularly but for detailed information on guest additions, refer to this link.
Please note that I will be using a virtual machine that was created in my other tutorial, CentOS 7 Server Install, accessible here.
Prerequisites
- VirtualBox VM with a CentOS 7 minimal install
- non-root user with sudo privileges
- Active Internet Connection
For instructions on how to install VirtualBox and extension pack, see my VirtualBox Install tutorial here.
If you do not already have a virtual machine, with a minimal install of CentOS 7, my other tutorial,
CentOS 7 Server Install, can be accessed
here.
Steps to complete tutorial:
- Take Post CentOS 7 Install Snapshot
- Create non-root user with sudo privileges
- Update CentOS 7
- Take Pre MATE Desktop Snapshot
- Install MATE Desktop
- Install EPEL package repository
- Install X Window System packages
- Install MATE Desktop packages
- Change Default Target to Graphical
- Boot to Graphical Target
- Take Post MATE Desktop Snapshot
- Install VirtualBox Guest Additions
- Take Post Guest Additions Snapshot
Take Post CentOS 7 Install Snapshot
The reason I want to take a snapshot, before we begin, is that we will be making a number of major changes to the virtual machine.
After successfully completing a major change, I find it helpful to create (take) a snapshot to act as a fallback mechanism. If something goes wrong during a major change, we can revert back to a working snapshot (previous stable state).
If you’ve completed my CentOS 7 Server Install tutorial, then, you’ve already taken this snapshot and can skip to the next step (Create non-root user with sudo privileges).
If you already have a CentOS 7 minimal install VM. I suggest taking a snapshot before continuing with the tutorial,to ensure that you have a starting point to revert back to.
Please note that you can name the snapshot whatever you like, just remember which snapshot is associated with which state of the virtual machine.
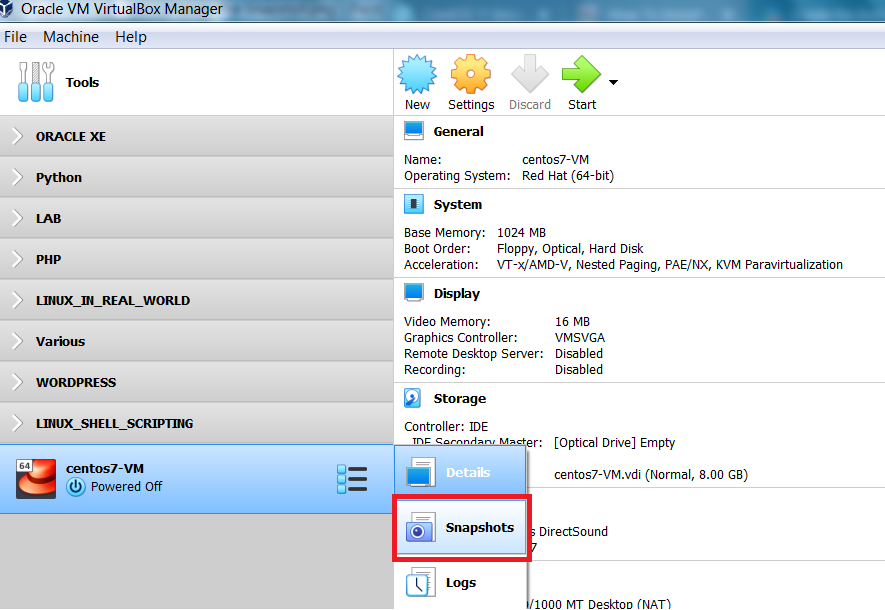
In the VirtualBox Manager interface, we are currently in Details view. To switch to Snapshots view, click the list icon next to the virtual machine name, and select Snapshots.
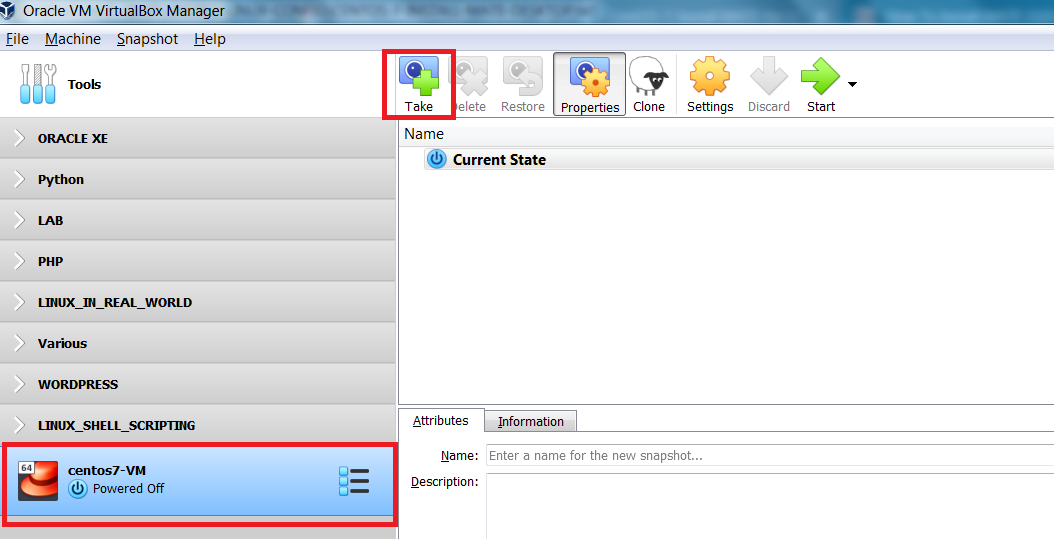
The Snapshots view will show you a listing of the snapshots created for the virtual machine.
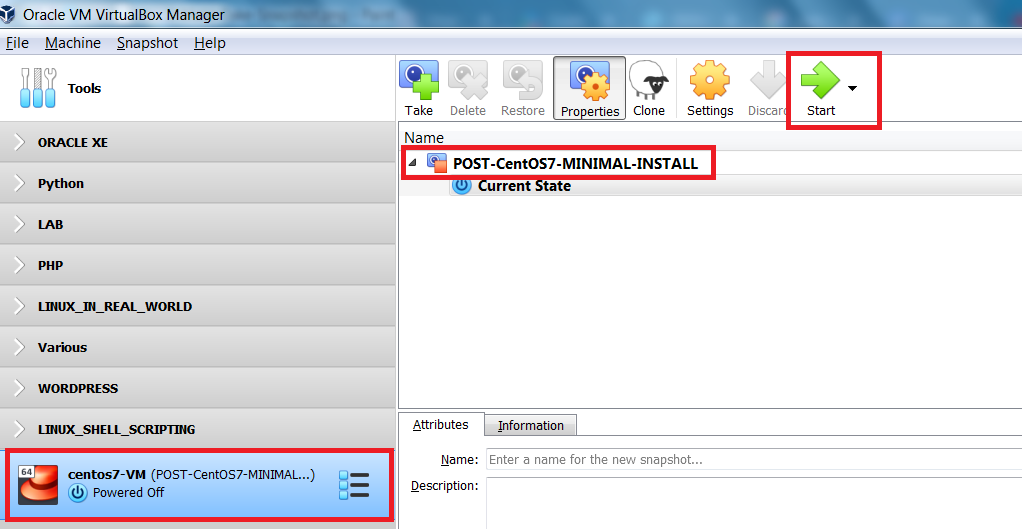
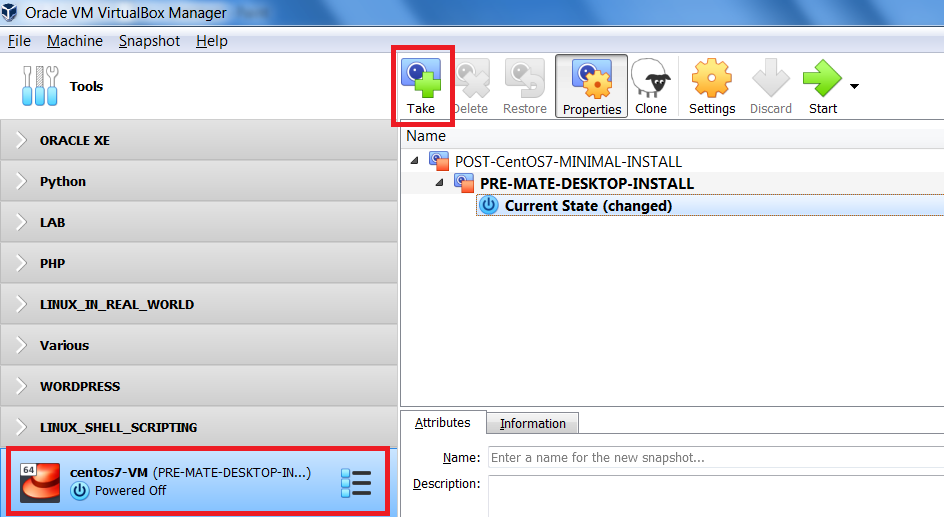
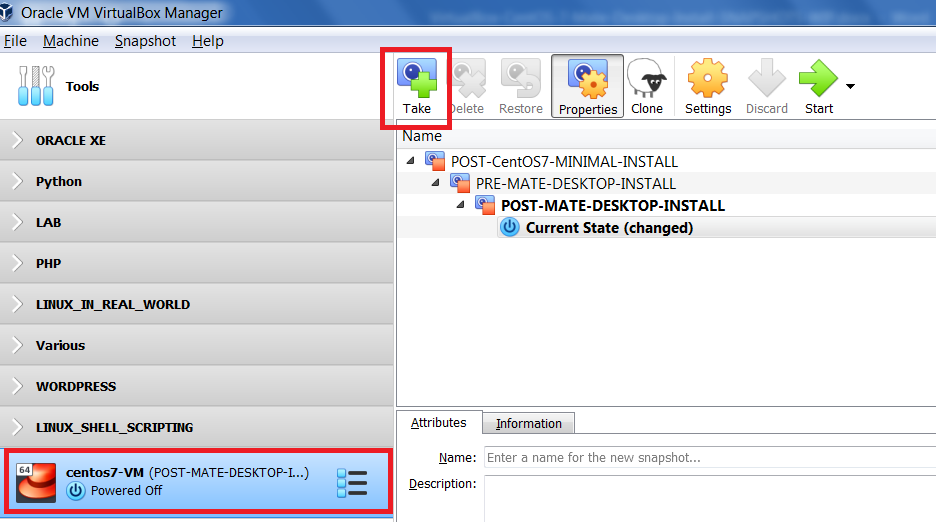
From the VirtualBox Manager’s interface, again, ensure your VM is selected, then, to create a snapshot click Take
|
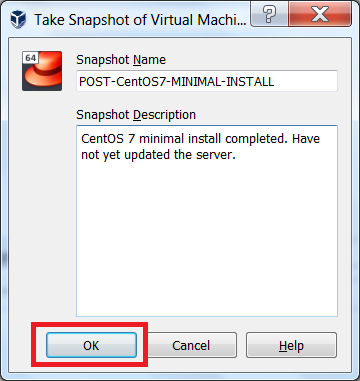
Enter a name for the snapshot, as well as, a short description, I've taken a snapshot POST-CentOS7-MINIMAL-INSTALL to Before installing the MATE Desktop, we will ensure that To perform a CentOS 7 system update, we need a
non-root user |
|
Create non-root user with sudo privileges
If you already have a non-root user with sudo privileges, please skip to the next step (Update CentOS 7)
To be able to update CentOS 7, install new packages, as well as, do most management tasks, the user performing
the operations must have sudo privileges, or, the operations must be performed by the root user.
In a production environment, it is good practice NOT to login as the root user, and to NEVER
perform operations
while logged in as the root user.
Since this is a lab environment, I will demonstrate the creation of a non-root user that has sudo privileges, while
logged in as the root user.
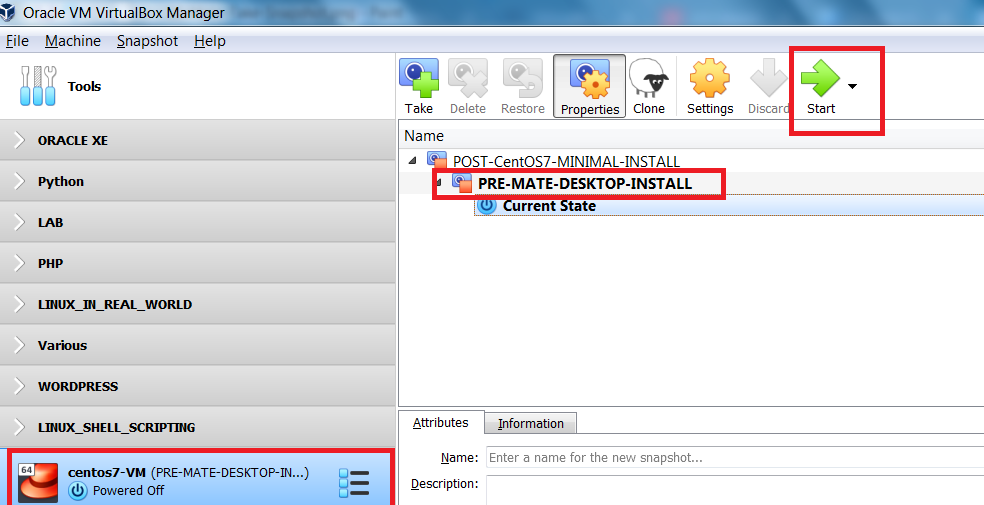
On the VirtualBox Manager interface, you will notice that we successfully took a snapshot. This ensures that we can
always revert back to a working virtual machine with a minimal version of CentOS 7 installed.
From the VirtualBox Manager interface, ensure your VM is selected and click Start
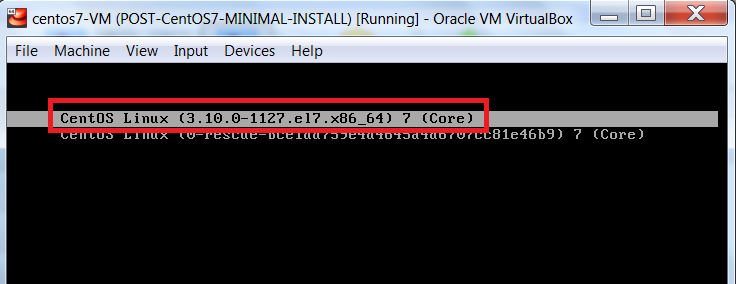
The CentOS 7 VM is starting and we are seeing the kernel being used during the boot process.
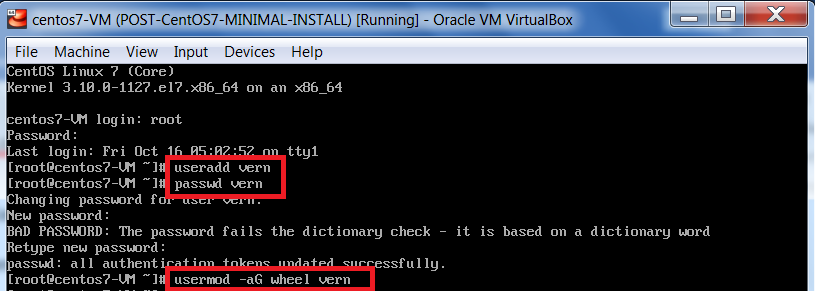
Once CentOS 7 has started, on the login screen, enter the root user’s credentials.
Now that we are logged in as the root user, we will create a non-root user with sudo privileges.
On the command line, execute the following commands (one after the other & enter password, when prompted):
useradd vern
passwd vern
usermod -aG wheel vern
Now we will verify that our newly created non-root user has sudo privileges.
On the command line, execute the following commands (one after the other & enter password, when prompted):
su – vern
whoami
id
sudo ls -al
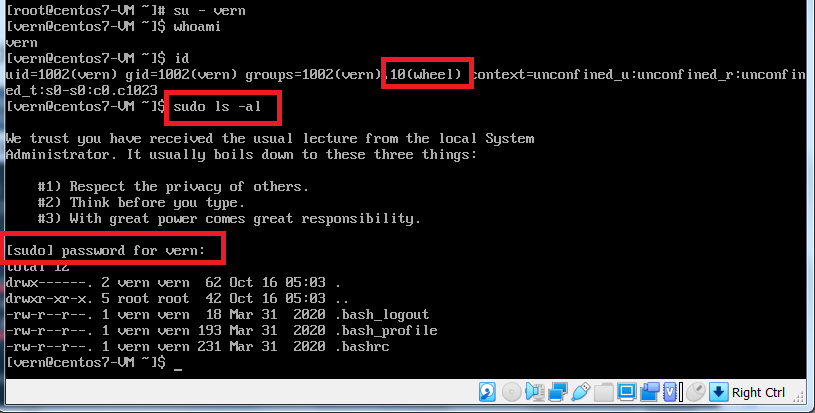
Now that we have a non-root user with sudo privileges (‘wheel’ group member), we are ready to update CentOS 7.
Update CentOS 7
Now to update CentOS 7. From the command line, execute the following:
sudo yum update
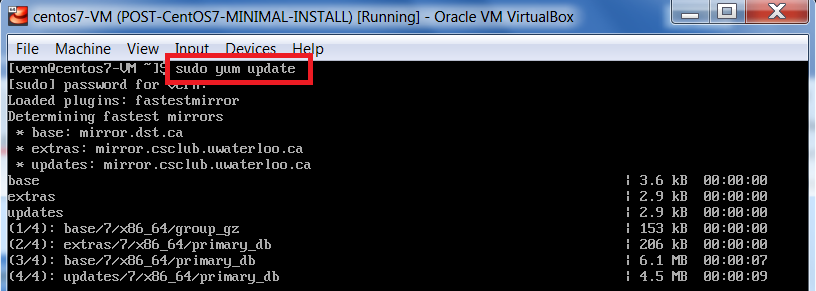
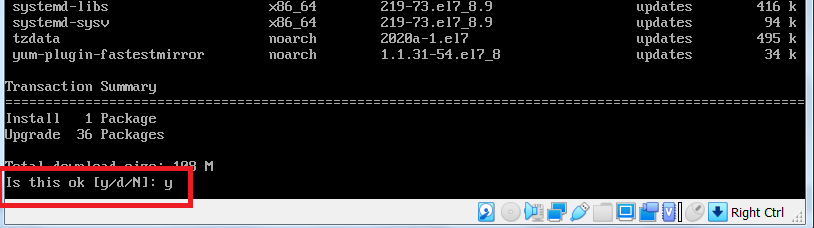
When prompted, enter y to accept the packages to be downloaded, installed and upgraded.
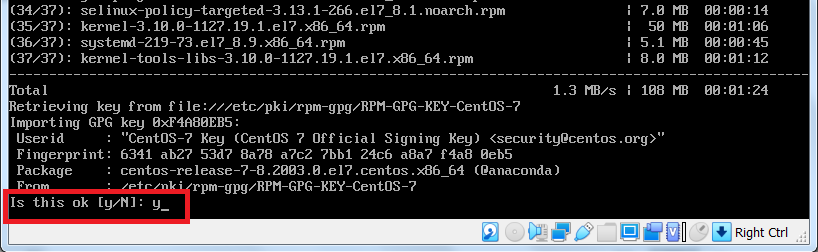
When prompted to use the local CentOS 7 Signing key to validate the downloaded packages, enter y
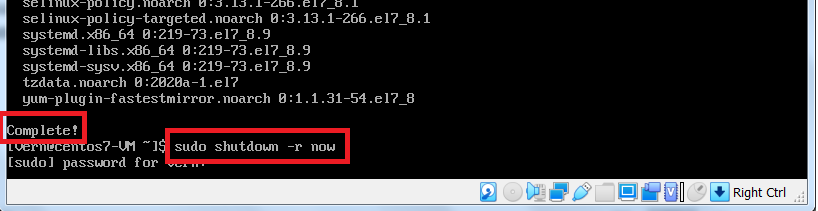
Your CentOS 7 system is now up to date. Let’s reboot to ensure the newly installed kernel will be used
as the core interface between the computer's hardware and its processes.
Remember to use your non-root user’s password to acknowledge the following command:
sudo shutdown -r now
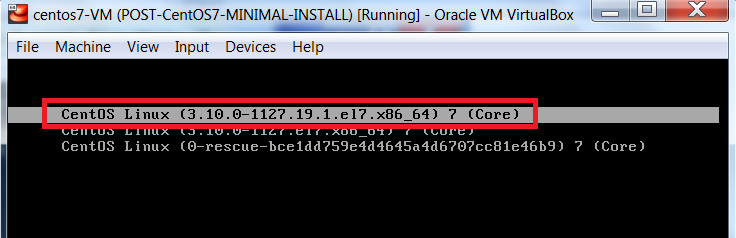
You should notice that the newly installed kernel is now being used
Please note that, for the rest of the tutorial, I will be using a different non-root user account (liam),
that also has sudo privileges.
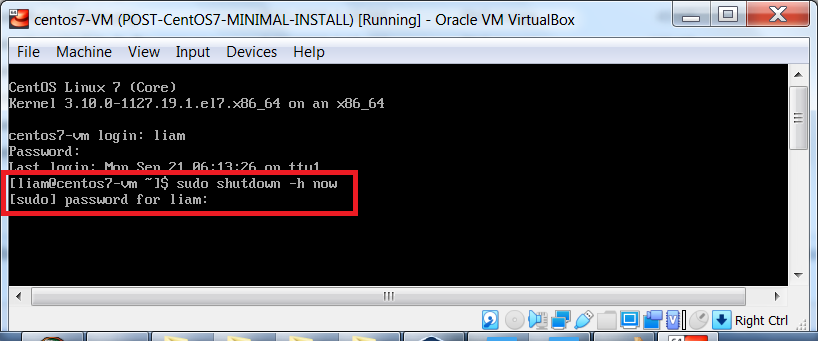
Now that our CentOS 7 install is up-to-date, let’s shutdown the VM and create another snapshot.
Remember to use your non-root user’s password to acknowledge the following command:
sudo shutdown -h now
Take Pre MATE Desktop Snapshot
Again, from the VirtualBox Manager interface, ensure your VM is selected and you are in Snapshots view.
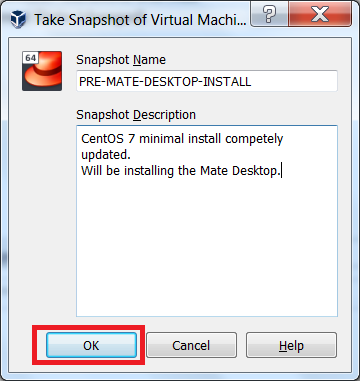
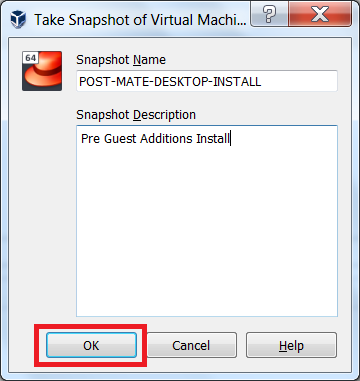
To create the snapshot, click Take

|
Enter a name for the snapshot, as well as, a short description, I've taken a snapshot PRE-MATE-DESKTOP-INSTALL to ensure Now that we have our snapshot in place, we are ready to install |
|
Install MATE Desktop
Now that our system is up to date, we can begin the installation of the MATE Desktop.
From the VirtualBox Manager interface, ensure your VM is selected and click Start
Install EPEL package repository
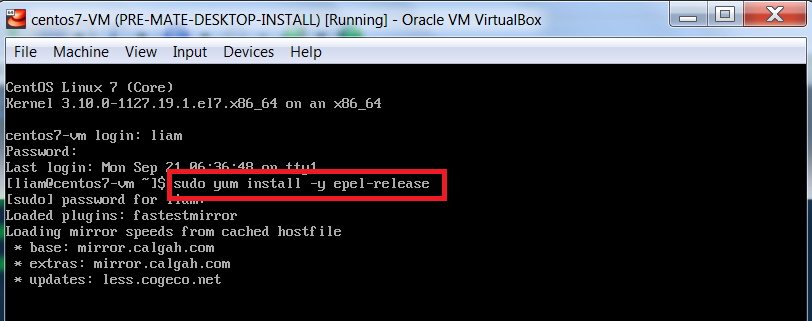
First, we must install the EPEL (Extra Packages for Enterprise Linux) package repository. This repository contains the packages required by the MATE Desktop.
Note in the next command I have included the -y command option. This will ensure that we are not prompted to accept the execution of the command.
From the command line, execute the following command:
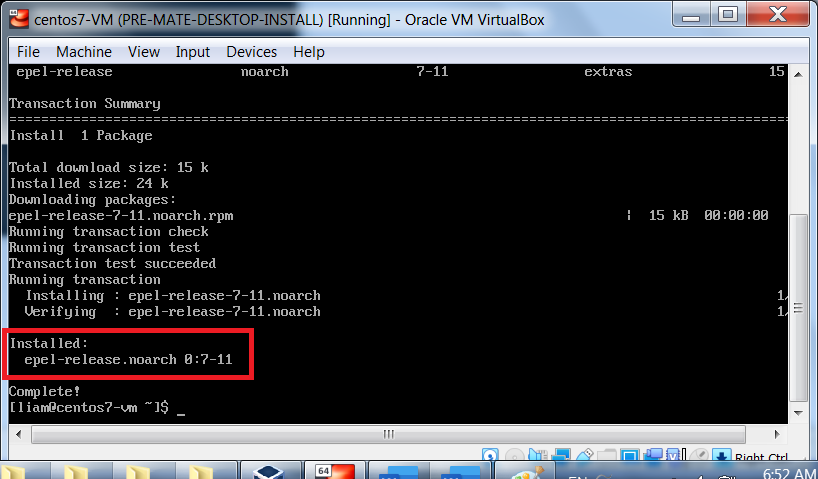
sudo yum install -y epel-release
You will notice that the epel-release package was successfully installed.
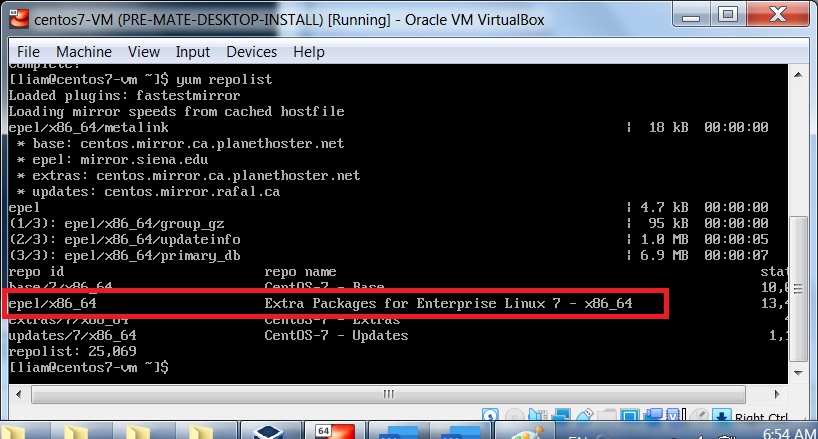
Let’s confirm that the EPEL package repository is available to us to complete the installation of the MATE Desktop.
From the command line, execute the following:
yum repolist
You should now see the EPEL package repository listed.
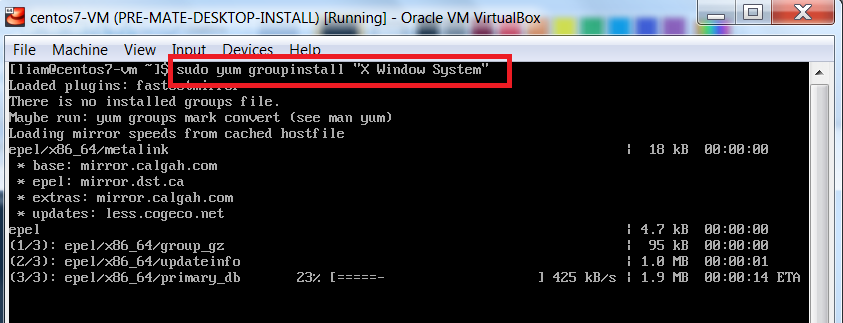
Install X Window System packages
Now we will need to install the X Window System which will act as our base for the MATE Desktop.
From the command line, execute the following:
sudo yum groupinstall "X Window System"
After entering your user’s password to acknowledge the command being run with sudo privileges,
enter y to accept the packages to be downloaded and installed.
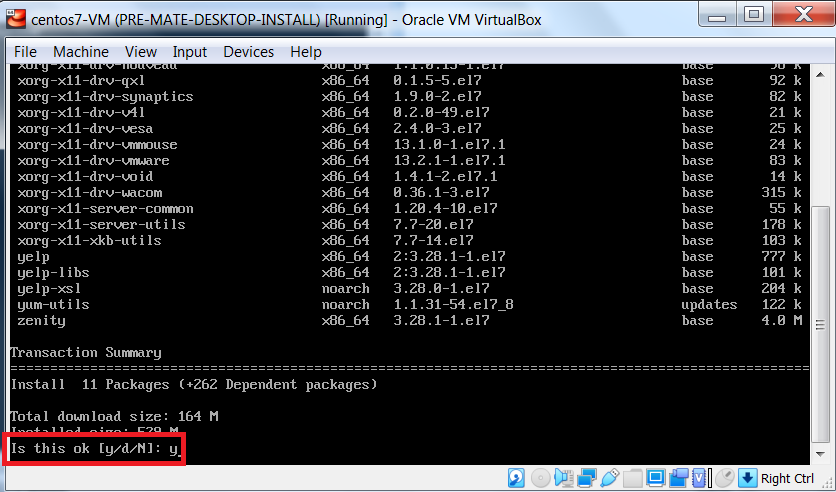
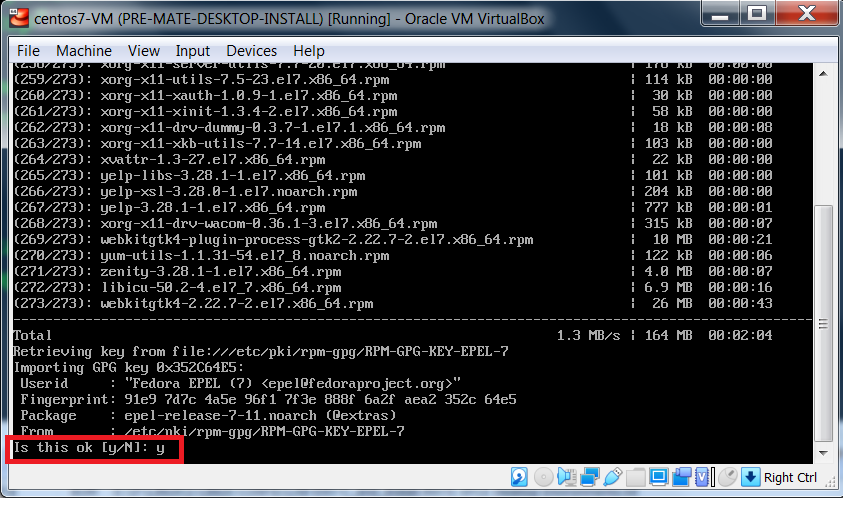
When prompted to use the local CentOS 7 Signing key to validate the downloaded packages, enter y
Install MATE Desktop packages
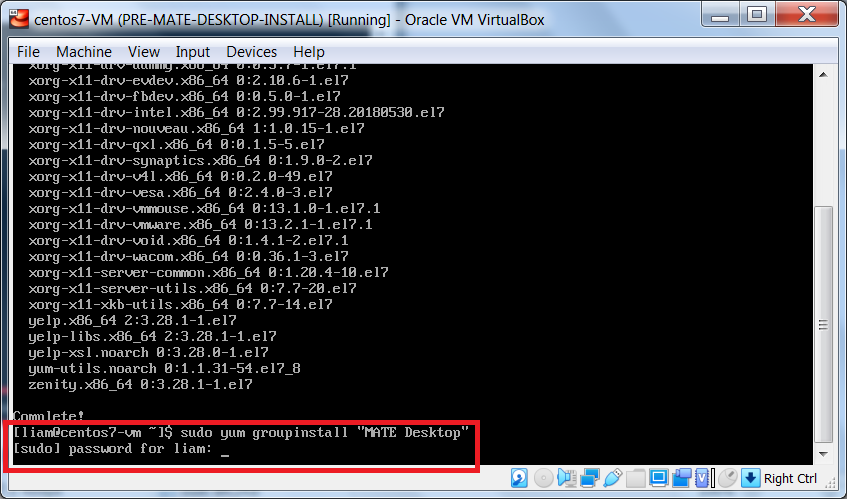
Below, you will notice that the X Window System packages were successfully installed.
Now we can install the MATE Desktop packages.
From the command line, execute the following:
sudo groupinstall "MATE Desktop"
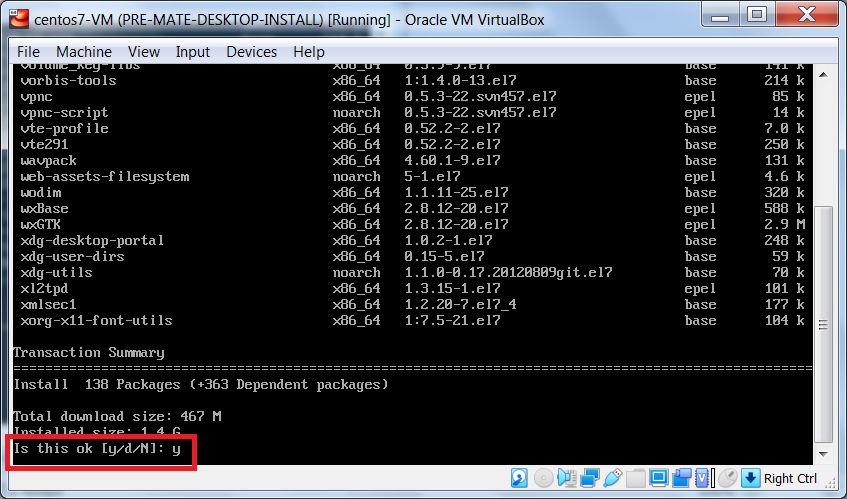
Again, enter y to accept the packages to be downloaded and installed.
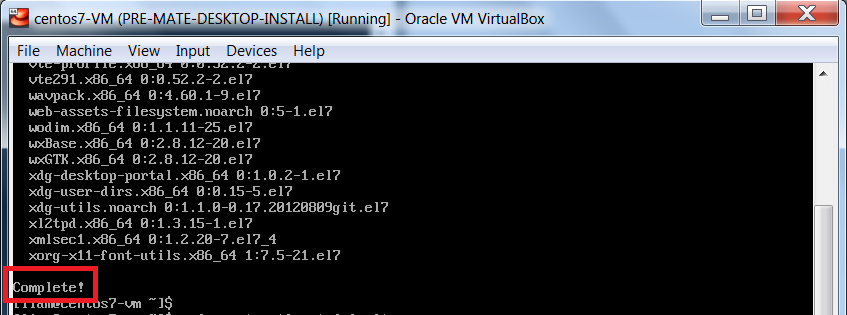
Below, you will notice that the MATE Desktop packages were successfully installed.
Change Default Target to Graphical
We will now need to change from runlevel 3 (text console mode) to runlevel 5 (graphical mode).
Since runlevels were used in the older SysVInit environments and CentOS 7 uses systemd, we will need to change from the
multi-user.target (text console mode) to the
graphical.target (graphical mode) to ensure that, when we boot our system,
we use the newly installed MATE Desktop.
From the command line, execute the following:
sudo systemctl set-default graphical.target
sudo shutdown -r now

Boot to Graphical Target
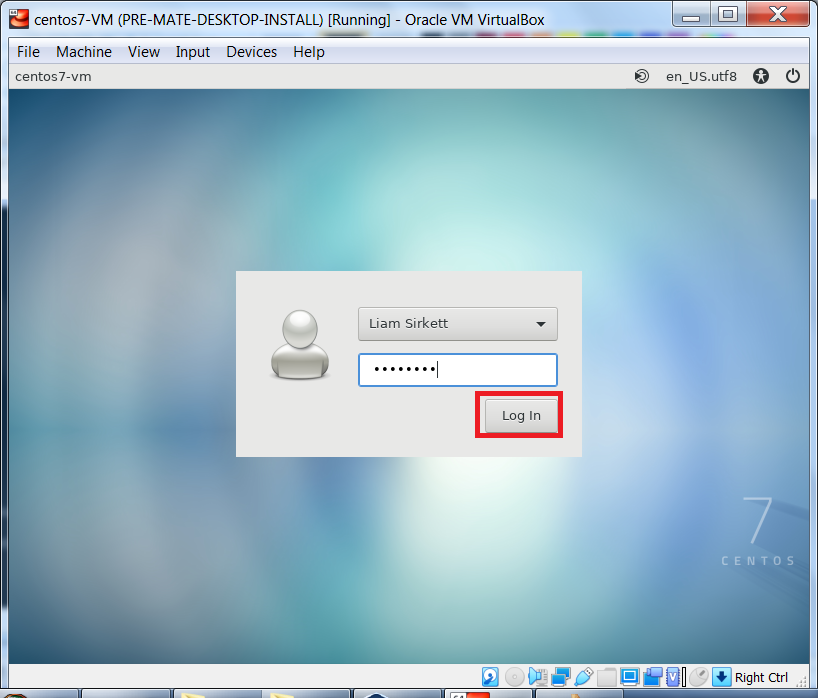
You will now be booted to the MATE Desktop. Enter your login credentials and click Log In.
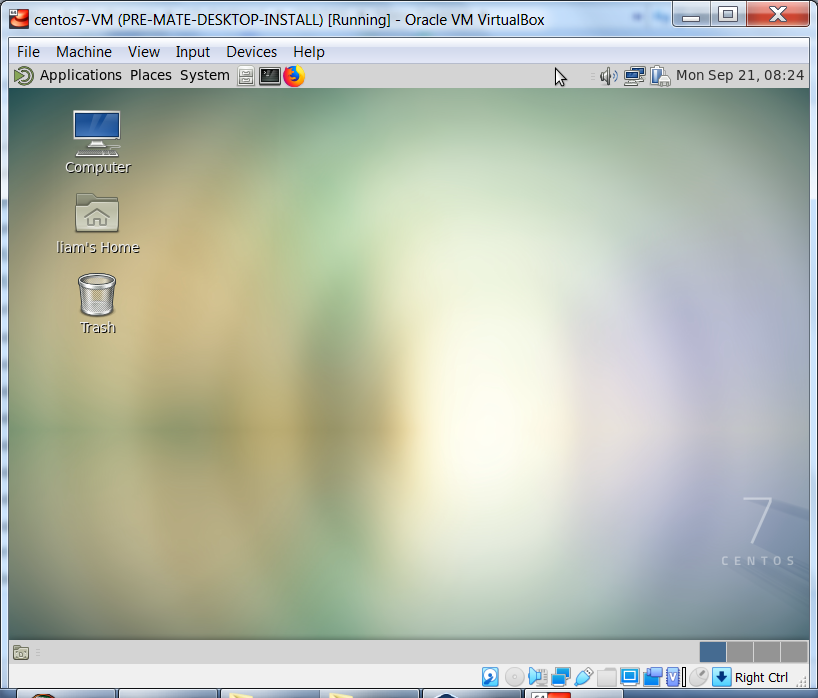
You are now logged in to the MATE Desktop environment.
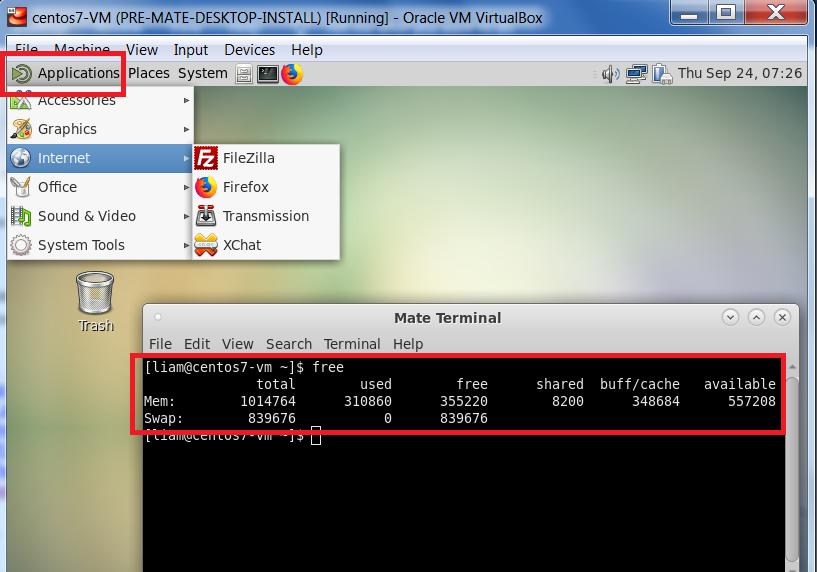
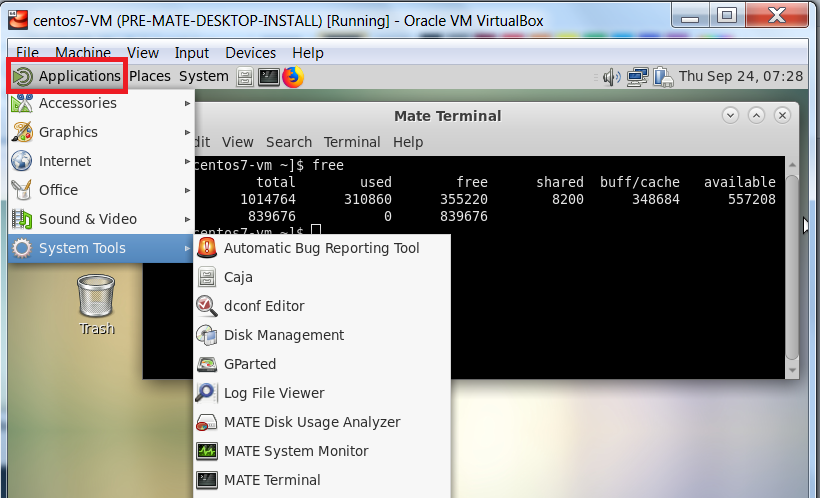
From the Applications menu, you will notice useful applications such as Firefox and FileZilla. I also opened a terminal
and executed the free command to show that the minimum amount of RAM is needed to power the MATE Desktop environment. Compare this output with the RAM required for a CentOS 7 minimal install (image below this one).
RAM required for a CentOS 7 minimal install.

There are also a number of System Tools to manage your system.
Now that we have successfully installed the MATE Desktop. Let’s shut down the VM and take a snapshot
before installing VirtualBox’s Guest Additions.
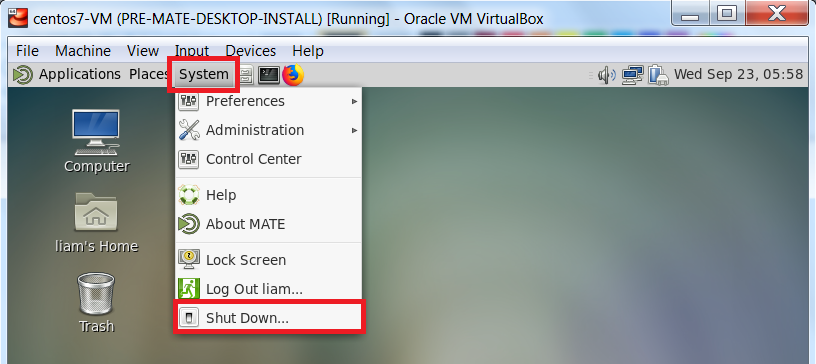
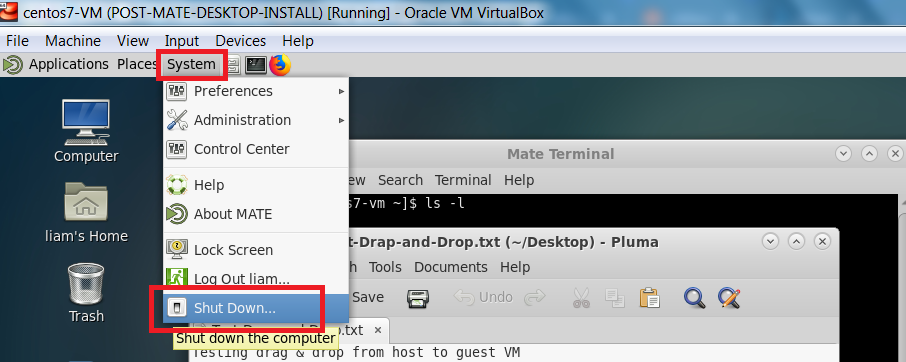
From the System menu, click Shut Down.
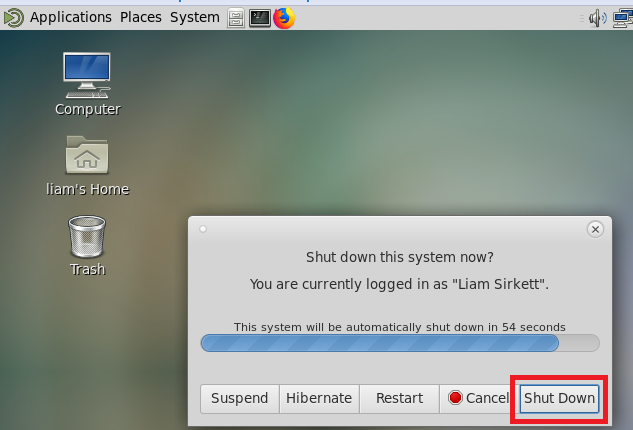
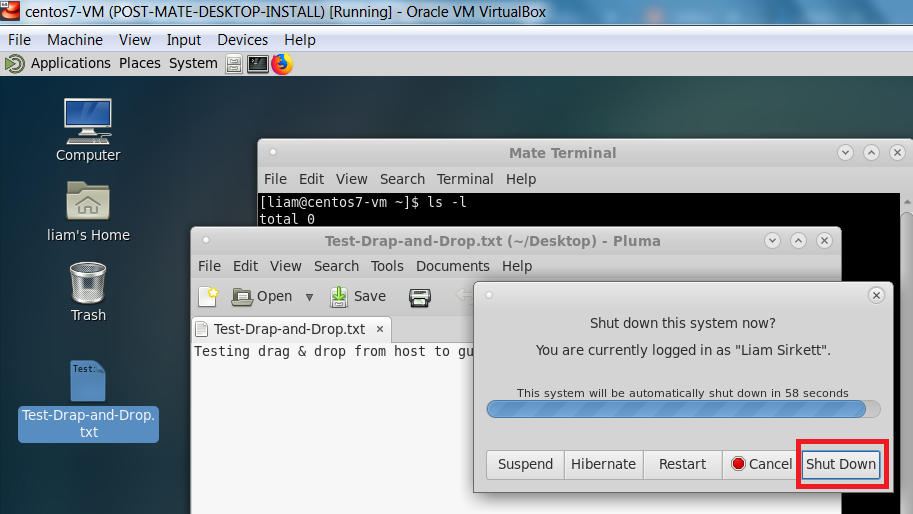
Then, click Shut Down to shut down your system.
Take Post MATE Desktop Snapshot
From the VirtualBox Manager interface, ensure your VM is selected and you are in Snapshots view.
To create the snapshot, click Take
|
Enter a name for the snapshot, as well as, a short description, I've taken a snapshot POST-MATE-DESKTOP-INSTALL to Now that we have our snapshot in place, we are ready to |
|
Install VirtualBox Guest Additions
From the VirtualBox Manager interface, ensure your VM is selected and click Start

Before we can install VirtualBox’s Guest Additions, we will need to ensure our current kernel has the
corresponding kernel-headers. First, we will verify whether, or not, the kernel-headers exist.
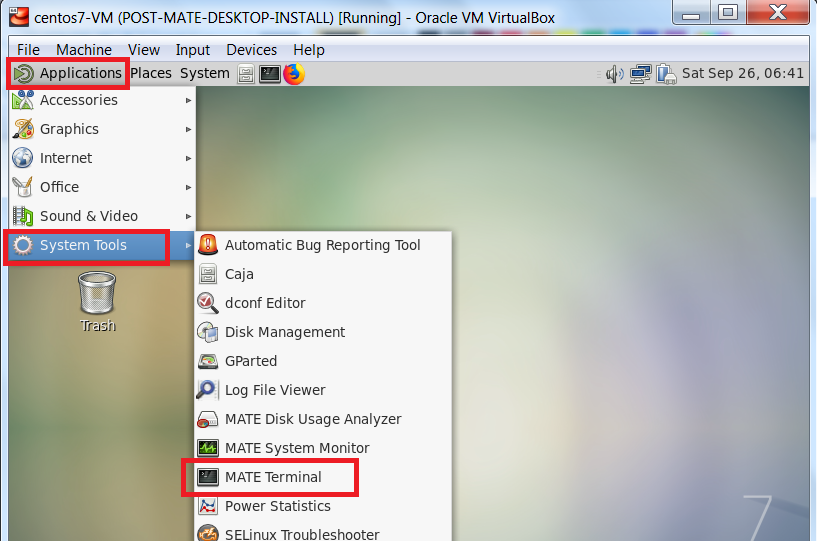
To open a terminal, from your MATE Desktop, click Applications -> System Tools -> MATE Terminal
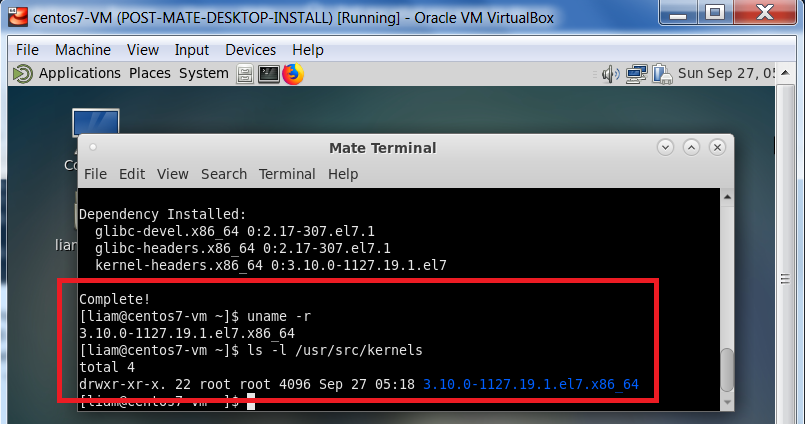
We will need to display our active kernel to determine which kernel-headers we need. To do this, from the
command line, execute the following commands (one after the other):
uname -r
ls -l /etc/src/kernels
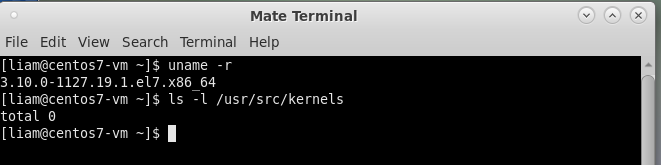
We see that no matching kernel-headers exist so we will need to install the kernel-devel package which provides kernel-headers. We will also need to install a few packages (gcc, make, perl) that the VirtualBox Guest Additions require to rebuild kernel modules.
Again, from the command line, execute the following:
sudo yum install -y gcc make perl kernel-devel
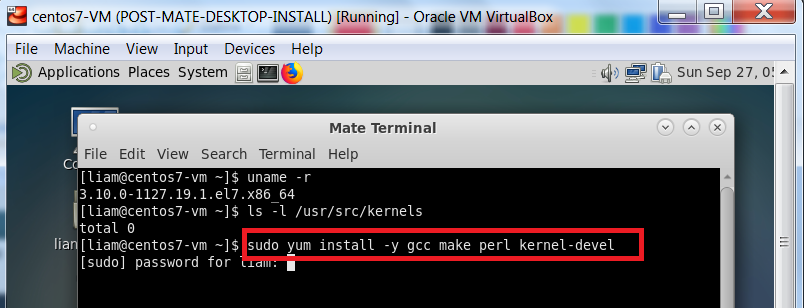
The packages were successfully installed and we now see the matching kernel-headers.
We are now ready to install VirtualBox’s Guest Additions.
Please note, in order to access the virtual machine’s main menu, you will need to exit the guest (virtual machine)
interface and return to the host machine interface, by hitting your Host key.
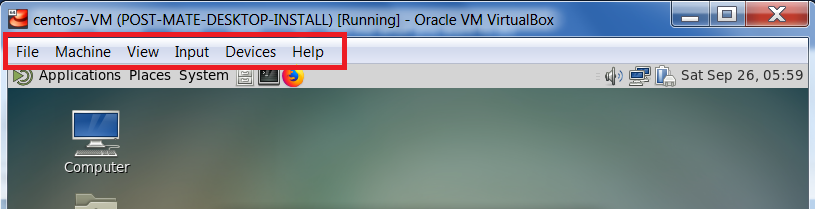
Check the bottom right-hand corner of the virtual machine's interface to determine what your Host key is.
For my Windows 7 host machine, my Host key
is the right Ctrl key (see image below).

Now you know how to exit the guest interface to access your virtual machine’s main menu.
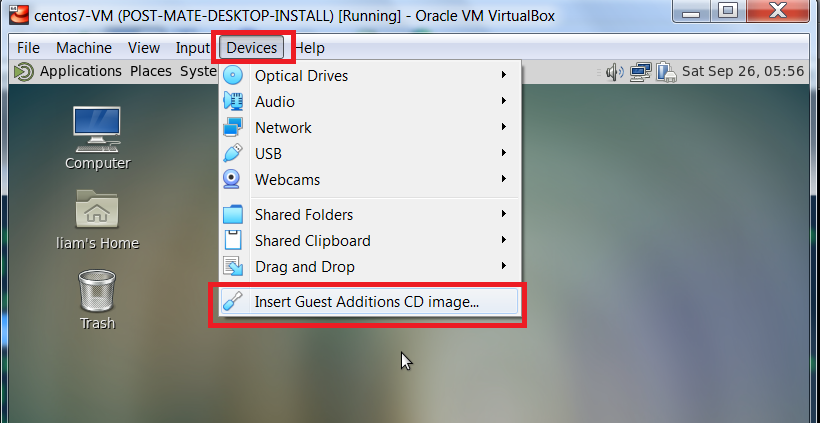
From the virtual machine’s main menu, select Devices, then click Insert Guest Additions CD image
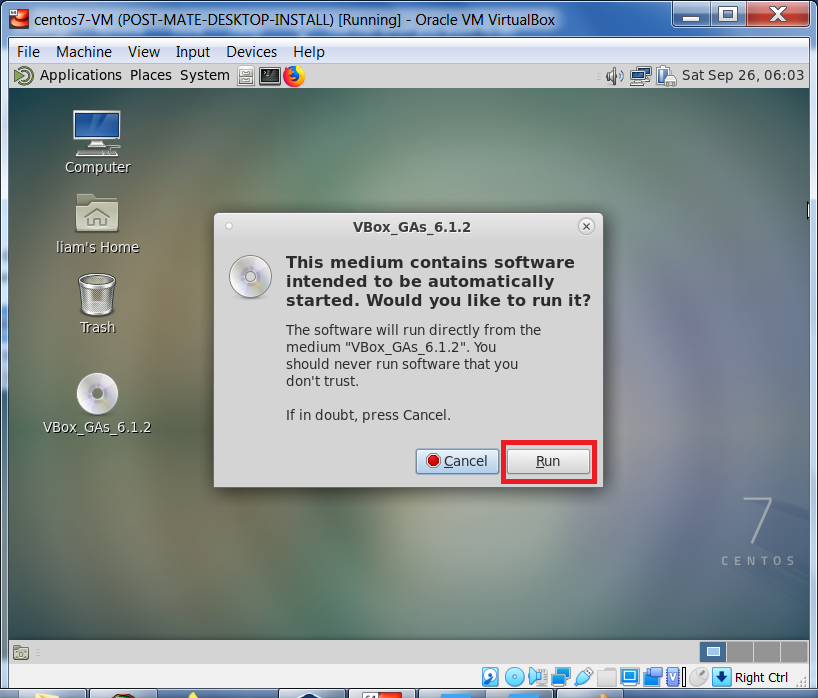
When prompted, ensure Open Autorun Prompt is selected and click OK
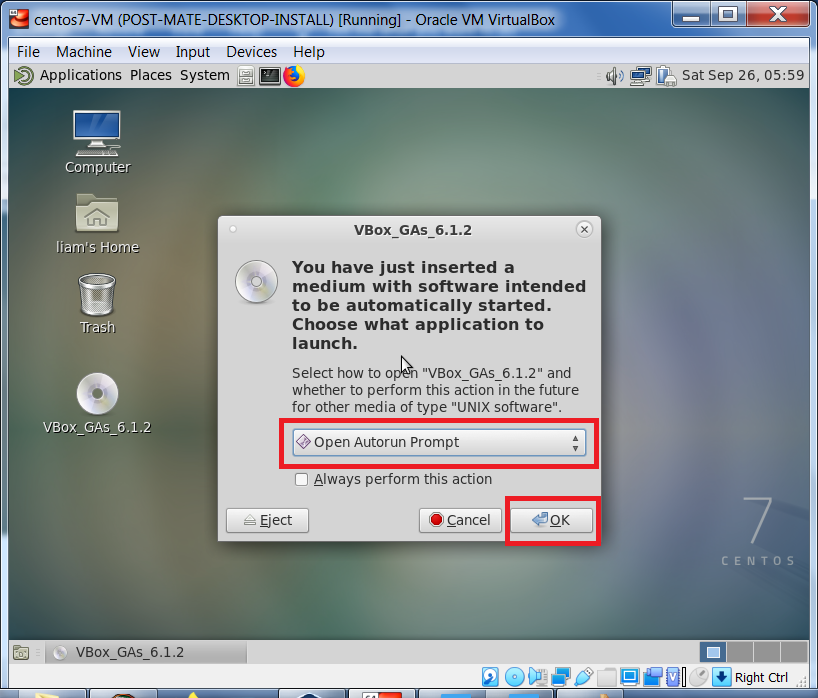
On the following screen, click Run.
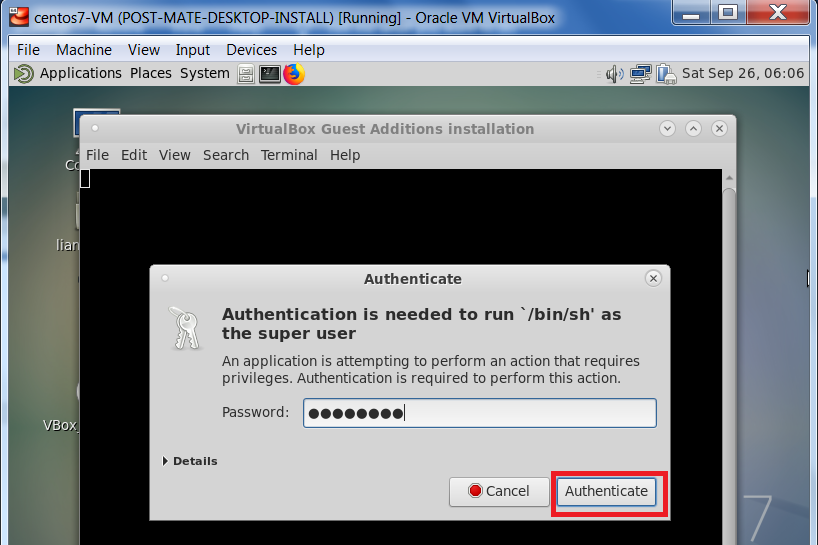
Note, to proceed, you will need to provide the root user’s password. Enter root’s password and click Authenticate
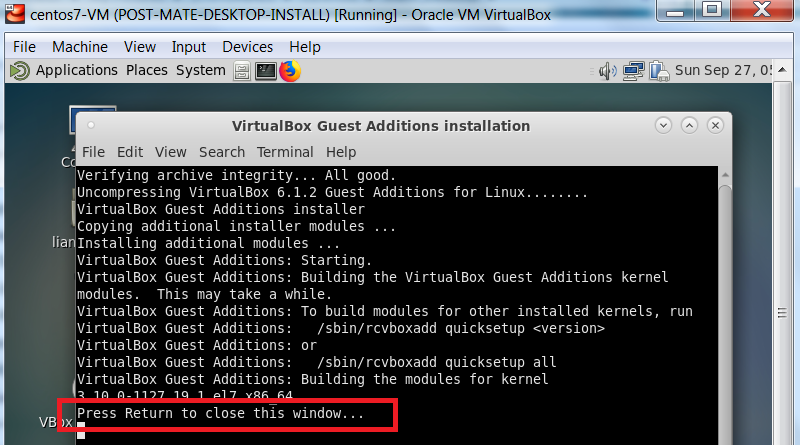
The VirtualBox Guest Additions installation will complete successfully. To continue, on your keyboard, hit Enter
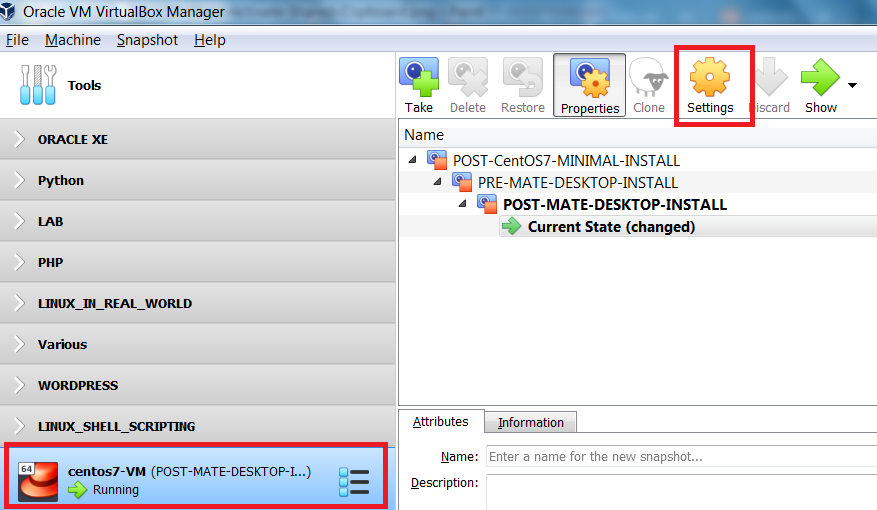
Before restarting the virtual machine to test the newly installed VirtualBox Guest Additions, return to the
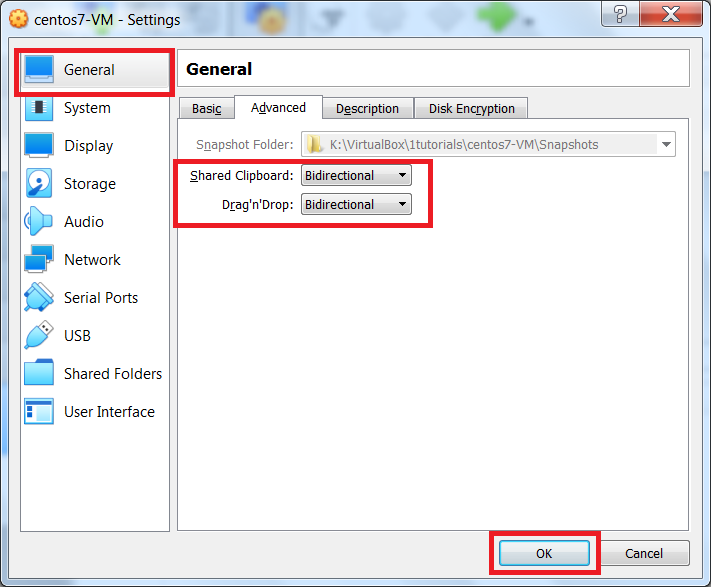
VirtualBox Manager interface, and click Settings for the running VM
On the left, ensure General is selected. Under General, select the Advanced tab and change both the
Shared Clipboard and
Drag’n’Drop settings from Disabled to Bidirectional. To continue, click Ok
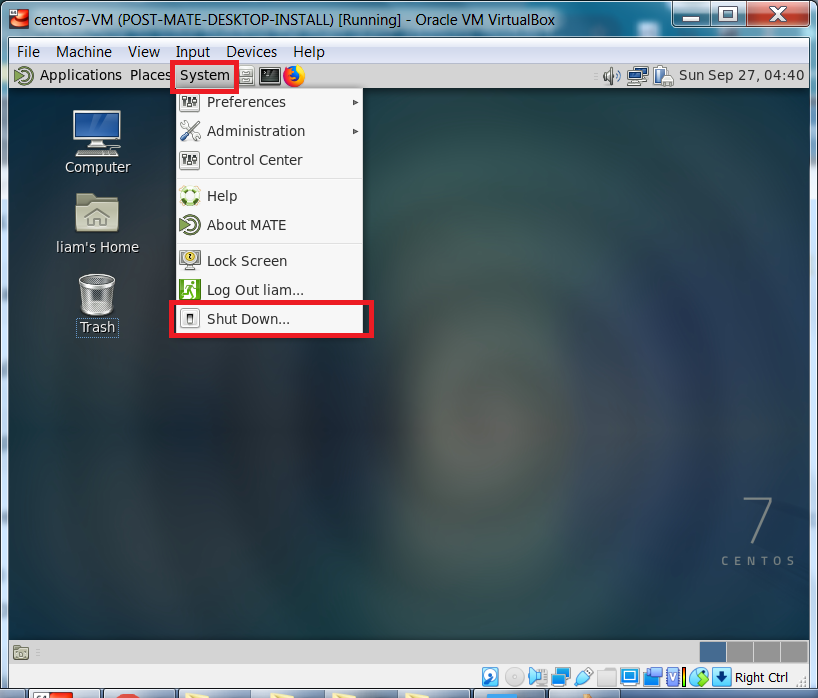
Now, return to the running VM and restart it by clicking System -> Shut Down
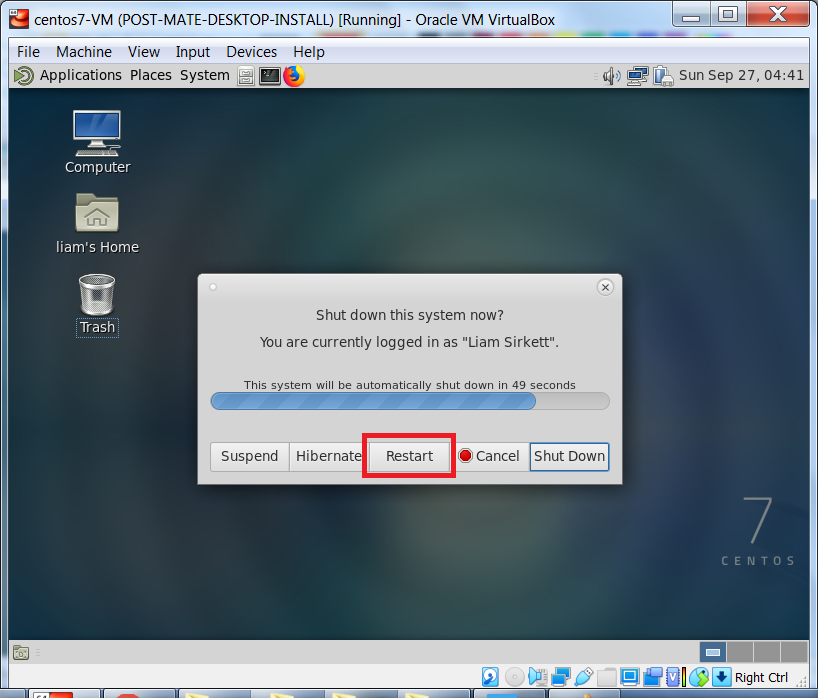
When prompted, click Restart
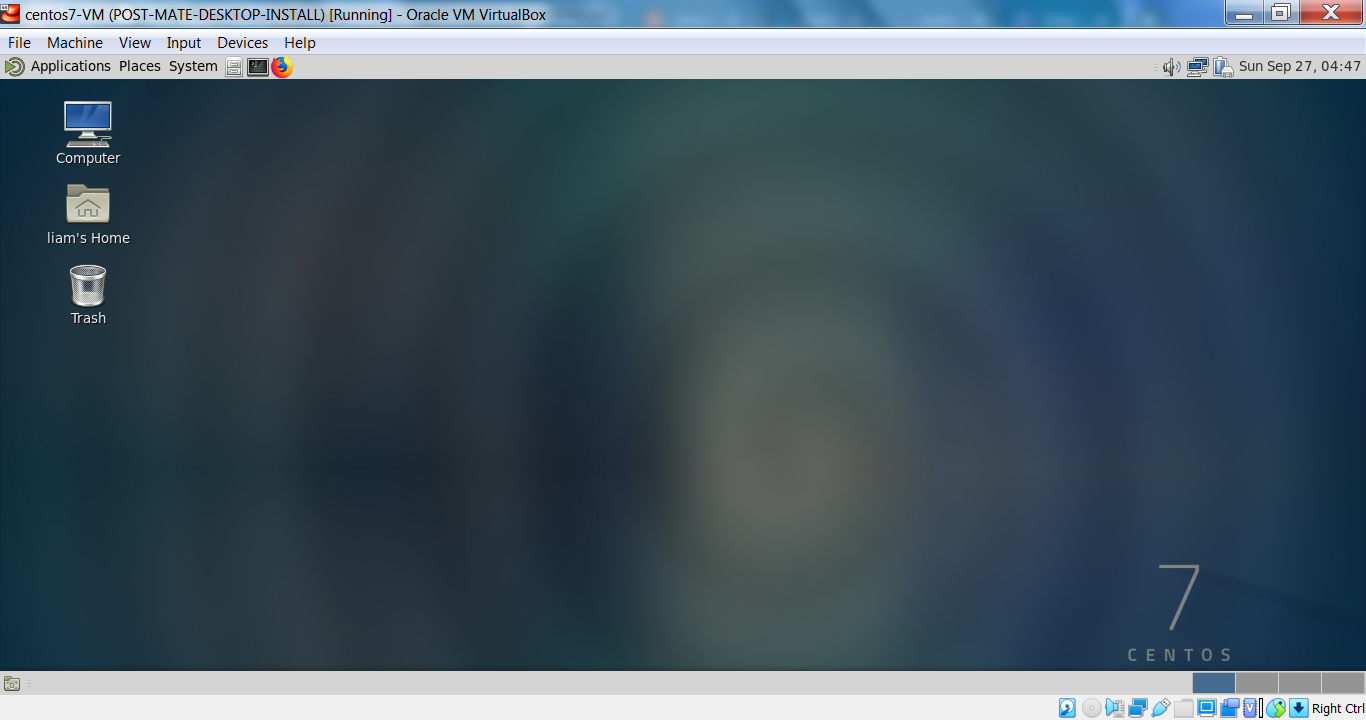
After the VM has restarted, login and, in the top right corner click to switch to fullscreen.
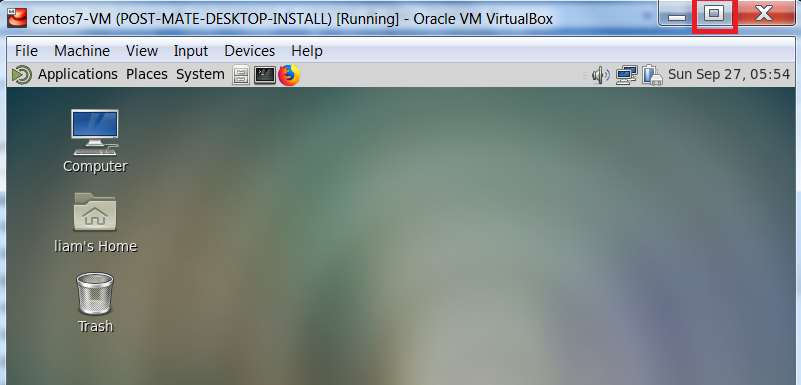
Now the VM can take up your whole screen. Next, we will test the Shared Clipboard and Drag’n’Drop settings.
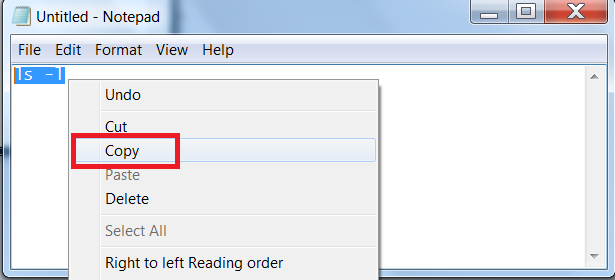
My Shared Clipboard test will be to copy text from the host and pasting it into the guest. This involves copying the text ls -l from a text editor on my host machine and pasting it into a MATE Terminal in my guest VM.
Step 1: Copy text from host machine
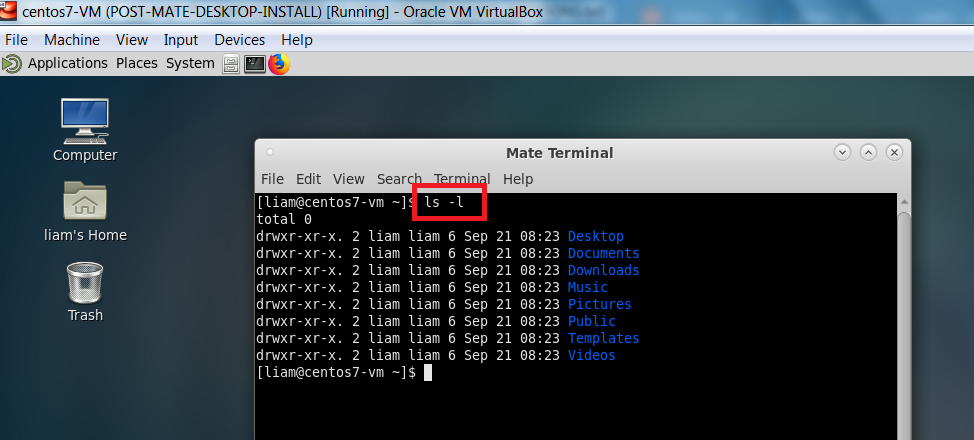
Step 2: Paste text into MATE Terminal in guest VM

Step 3: Finalize paste operation and execute command
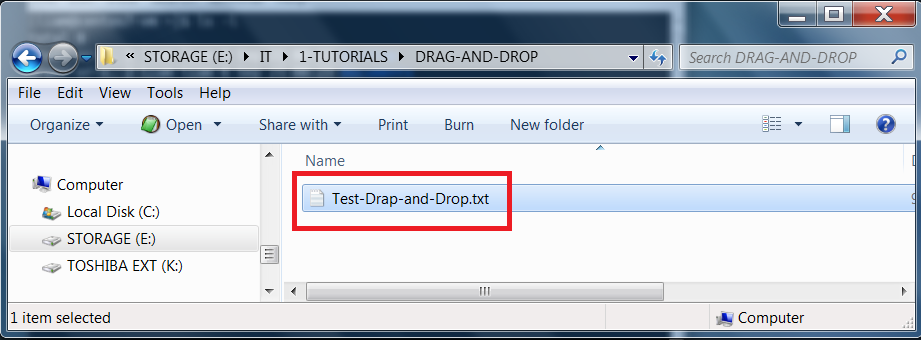
My Drag’n’Drop test involves creating a text file on my host machine and dragging it onto my guest VM’s desktop.
Then, opening the file in the virtual machine.
Step 1: Create text file on host machine
Step 2: Drag text file from host machine onto guest VM’s desktop

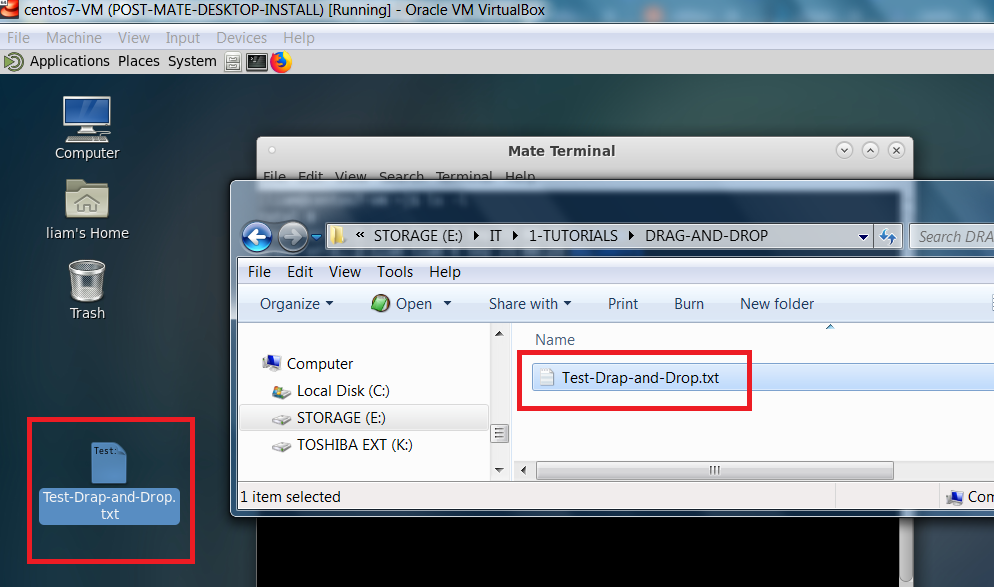
Step 3: Open text file in guest VM

We will now shutdown the virtual machine. From the System menu, click Shut Down.
Then, you can wait for the timer to expire or click Shut Down to shut down your system.
After shutting down our system, it would be a good idea to take a snapshot.
That way, if we ever need a CentOS 7 server with a GUI virtual machine that already has
VirtualBox's Guest Additions installed, we can clone this snapshot in seconds.
Take Post Guest Additions Snapshot
From the VirtualBox Manager interface, ensure your VM is selected and you are in Snapshots view.
To create the snapshot, click Take
|
Enter a name for the snapshot, as well as, a short description, I've taken a snapshot POST-GUEST-ADDITIONS-INSTALL to |
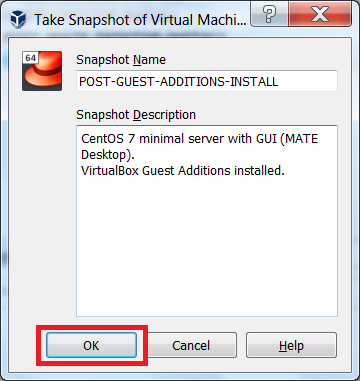
|
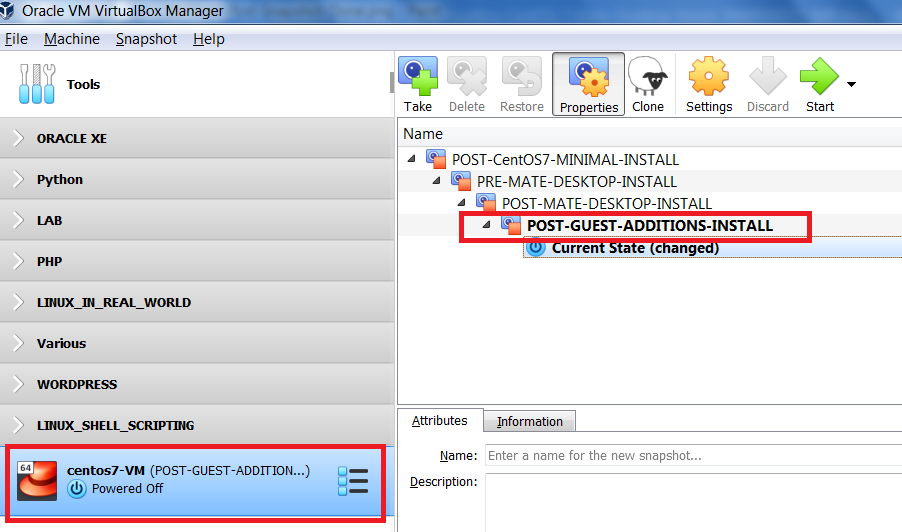
We have successfully installed the MATE Desktop, as well as, VirtualBox’s Guest Additions on a CentOS 7 VM.
Along the way we created a number of snapshots to act as fallback mechanisms. At any time, if a virtual machine becomes unresponsive, we can always revert back to a working snapshot. We can also clone a snapshot, as long as, the snapshot was taken when the virtual machine was powered off.
Hopefully, you’ve enjoyed completing this tutorial and found it helpful.
You can access all of my tutorials here.
Or, if need be, you can download this tutorial CentOS 7 Server Install with GUI.